Search Results for: map penn mountain state forest 2

Columbus Day 2015 morning

Good Morning! As I now have cellphone service, here is a brief update from Sunday. More updates latef.

As soon as I got into Maryland then West Virgina I lost cellphone service. I am surprised, as except for the Adirondacks and a few valleys in Western NY or the Catskills, I usually have good cell service. The same thing is true with the Northern Tier of Pennsylvania, and heck I had good service most of the way down through Pennsylvania on US 219 until I entered Maryland. Then there was no service in Maryland and West Virgina, anywhere I went along US 219 and down through WV Route 32. This is why I haven’t posted a update since yesterday morning.

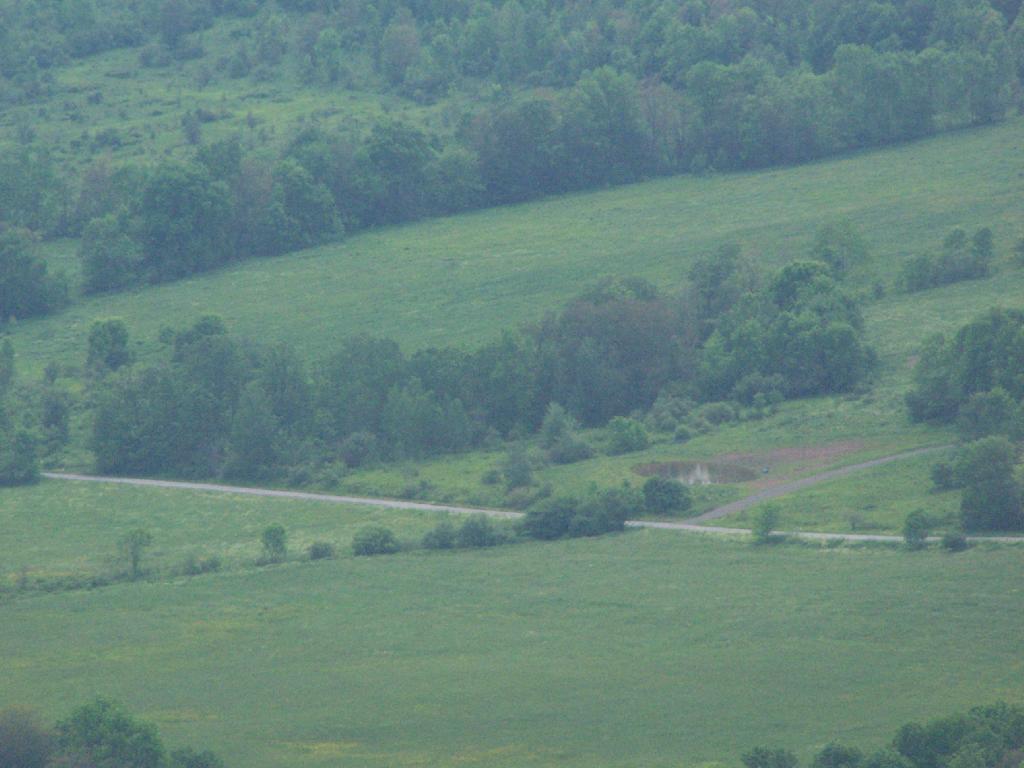
Saturday night was a pleasant night up on Loleta Grade Road at the Allegheny National Forest. I had previously camped on Loleta Grade Road, but never took the part of Loleta Grade beyond where it leaves the East Branch of the Millstone Creek. Loleta Grade Road (FR 133) gets a lot narrower and somewhat narrower past the Millstone Creek and passes several marshlands and has a handful of campsites on it. It turns out the portion of Loleta Grade Road by East Millstone Creek is closed for reconstruction. They have a done such a nice job at building and improving roadside campsites throughout the Allegheny National Forest, while adding earthen barriers or rock barriers to protect forest resources from people driving past the campsites. Each campsite has a natural stone fire ring and many of them hardened with gravel. Loleta Grade was pretty with the fall colors. I took several pictures and will be uploading them as Internet or cellphone data service becomes available. The sun didn’t rise above the horizon of the forest until well after 8 AM this morning, although first light came a little before 7 AM. The campsite I was at was Forest Road 777, which I knew was a sign of good luck for the day.

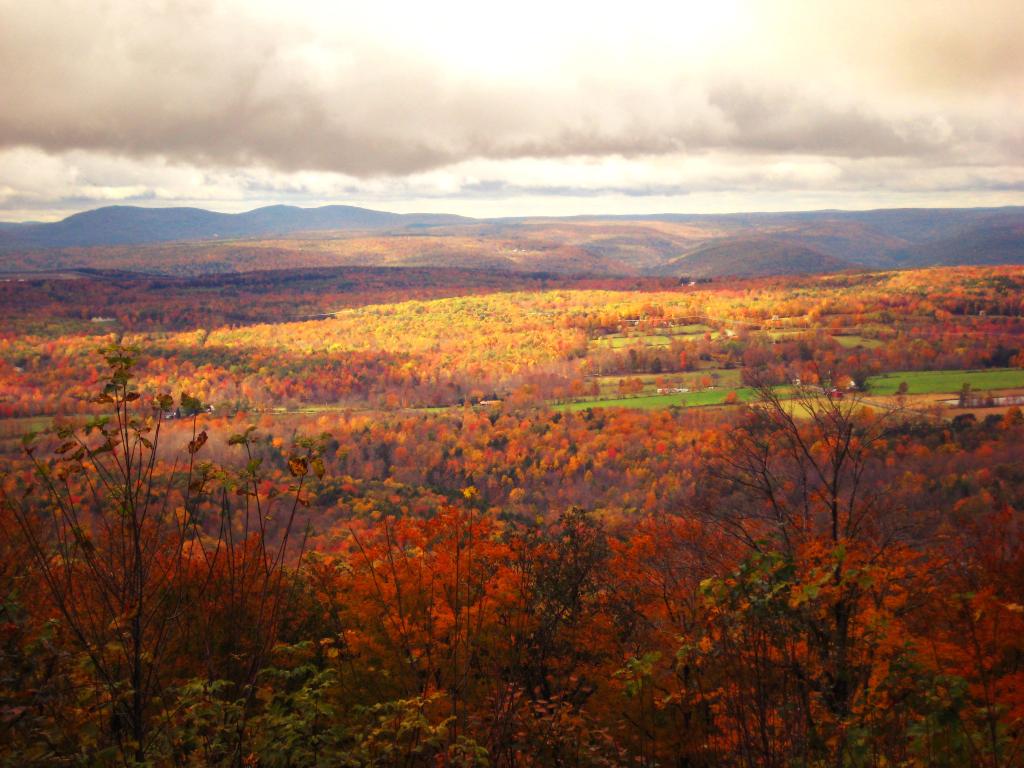
Drove Along PA 3002 along the Clarion River to Ridgeway. That’s another part of the Allegheny National Forest I had never explored before. The Clarion River was pretty with the leaves turning, and looks like a lot of fun to paddle at least downstream. It has a good current but is deep and flat enough that it’s not white water by any means. I stopped along one of the State Game Lands where a creek – which I don’t know the name of – cross through a hollow in peak colors. It was beautiful. Eventually I made it to Ridgeway, and much like you would expect from that town, the approach into the city was a steep drive down. Ridgeway stunk of the hydrogen sulfide from paper manufacturing.

Then it was down US 219 all the way down to West Virigina. It’s a beautiful drive, but oh my gosh, does US 219 wind and have some steep descents and climbs. It also hits a lot of hick towns – some quite pretty and others dying coal mining towns – that are mostly sustained these days by government services and healthcare. Some nice farm lands and great sweeping vistas along the way, but not a lot of places to pull over and take pictures. To make matters worst I drank a lot of coffee this morning, and after a piss break at McDonalds bought more coffee and spent have the afternoon looking for places to take piss breaks. US 219 certainly winds a lot. The locals were blowing past me whenever they could pass me or whenever I would pull over. I don’t consider myself to be a slow driver, but with those narrow lanes and windy roads, I certainly had to hold back my speed a bit especially with my big lifted truck.

US 219 becomes an expressway after Clariton and the first ten miles of it is spectacularly beautiful. It reminds me a lot of the Taconic Parkway, only more modern and wider but with many of the same sweeping views of farm country and color packed hills. Some of the steepest hills I’ve ever driven on an expressway. Eventually the terrain becomes more rolling, with some larger farms. I ended up getting off a few different exits looking for a place to piss, and then got back on not finding one. I didn’t stop for a badly needed piss break until I reached a fast-food place just over the line in Maryland, where US 219 joins I-69 for a brief concurrency. The clerk at Burger King in Maryland there had a strong Southern Accent, but strangely enough when I got into West Virgina, the clerk at the gas station sounded modestly Appalachian but without much of a noticeable accent – even less then the Midwestern/Appalachian accent what I heard in Northern Pennsylvania. Being that I was in a hurry to get to West Virgina to figure out where I would camp and realizing that the Flight 92 memorial was 9 miles from US 219, I decided against visiting the memorial. It’s possible it was closed on Sunday. I got off US 219 at this one exit and drove through this large, old coal mining town with narrow roads and houses on the edge of a cliff, facing a mountain whose top had been blown off years ago to produce bituminous coal. At the bottom of the mountain was a vast tank that was being used to collect and treat acid mining discharge. Kind of sad to be driving past a place that time in many ways had left behind with nothing but a toxic legacy. Pennsylvania has a lot of old, small towns that were heavily built up during the industrializing era of America but seem to have little purpose today besides cheap housing and traditional communities.

South of the Pennsylvania Turnpike US 219 suddenly becomes a two lane road. You have to exit the expressway and then drive on another pokey local part of US 219 then you get diverted on a completed section of US 219. It’s obvious from the construction that Pennsylvania plans to continue the US 219 expressway all the way to Maryland border – a project that is requiring the blasting away of whole mountains and building massive bridges through the steep terrain of the Laurel Highlands. After driving a few miles on the congested highway, you get back on the expressway for a few miles before it drops back down two lanes, and your in Maryland.

It’s pretty wild driving I-69 in Maryland with it’s steep hills and the 70 MPH speed limit. At times I was pushing Big Red almost to the floor climbing over the mountains at the speed. I-69 is very twisty and steep. By interstate standards it seems to be sub-prime in design, but that may have to do more with the steep Appalachian terrain then the engineering that had to blast a 70 MPH expressway through. Heading west on I-69 traffic was fairly light. Stopped at a nice overlook on US 219 just after getting off of I-69.

I don’t have much good to say about Garnet County, Maryland or the state of Maryland more generally. US 219 crosses more of Western Maryland then most other roads, cutting through the widest portion of Maryland between Pennsylvania and West Virgina. A lot of farms in this part of the state, perched up on hills. Evidence of coal mining was all over, and honestly the terrain didn’t differ that much from the Laurel Highlands of Pennsylvania. Farther south of I-69, past a town named Accident, the terrain became more rolling and you could see to the east the Blue Ridge Mountains. A lot of wind turbines on the mountains. Unlike Pennsylvania, no burn barrels in Maryland. Apparently they don’t like the smell of burnt plastic as much as Pennsyltuckians. A lot of traffic on US 219 near Silver Lake in Maryland and the city of Oakland was pokey. People must come from Baltimore to vacation in Western Marlyand. But then it opened up to farm country, and I was in West Virgina without warning except for a brief county sign and a very stern sounding sign warning against littering – a $25,000 fine, lost of license, and jail for littering. Didn’t stop people from leaving litter on the road though as seen driving down US 219.

Maryland is probably a state best known for Spiro Agnew, our country’s only Grecian Vice President. Too bad he had to resign as Nixon’s Vice President for graft as Governor of Maryland and failing to pay on taxes on that graft. Also Martin O’Mallary, the former Democratic Governor best known for his unpopular gun control laws. Of course the whole time driving through the commonwealth, I drove carefully with an eye for cops, because I vaguely remember that Maryland is a state where they are really strict about their fender law, and are known to ticket people driving jacked up pickup trucks with tires sticking out past the fenders, as is the case with my truck. Lot of people have lifted trucks in Western Maryland, but that may be a southern thing too. People in Western Maryland may be relatively wealthy, with money from Baltimore and Washington suburbs to pay for their jacked up truck addiction.Β  Most had fenders but not all did. I am also not an expert on Maryland gun laws, but I figured I was probably okay just driving through the state with a cased, locked, and unloaded shotgun and 22 in back of my truck. I made it through the state, and took a deep breath once I realized I was in West Virigina. I have nothing good to say about Maryland, the state that is dominated by shitty Baltimore and Washington suburbs, with a neck following the Potomac River quite a ways out west. On the way back I will probably take US 220 through Maryland, which cuts through a lot narrower section of Western Maryland just to cover my fears of that god awful state that sticks between a lot of Pennsylvania and Virgina and West Virgina.

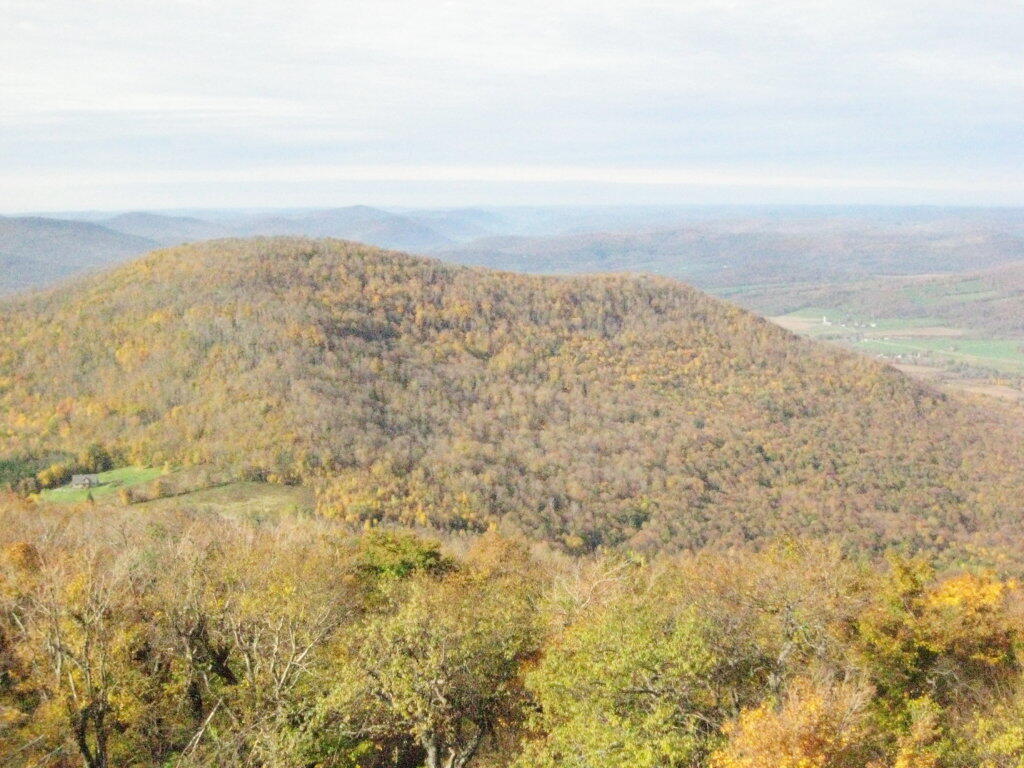
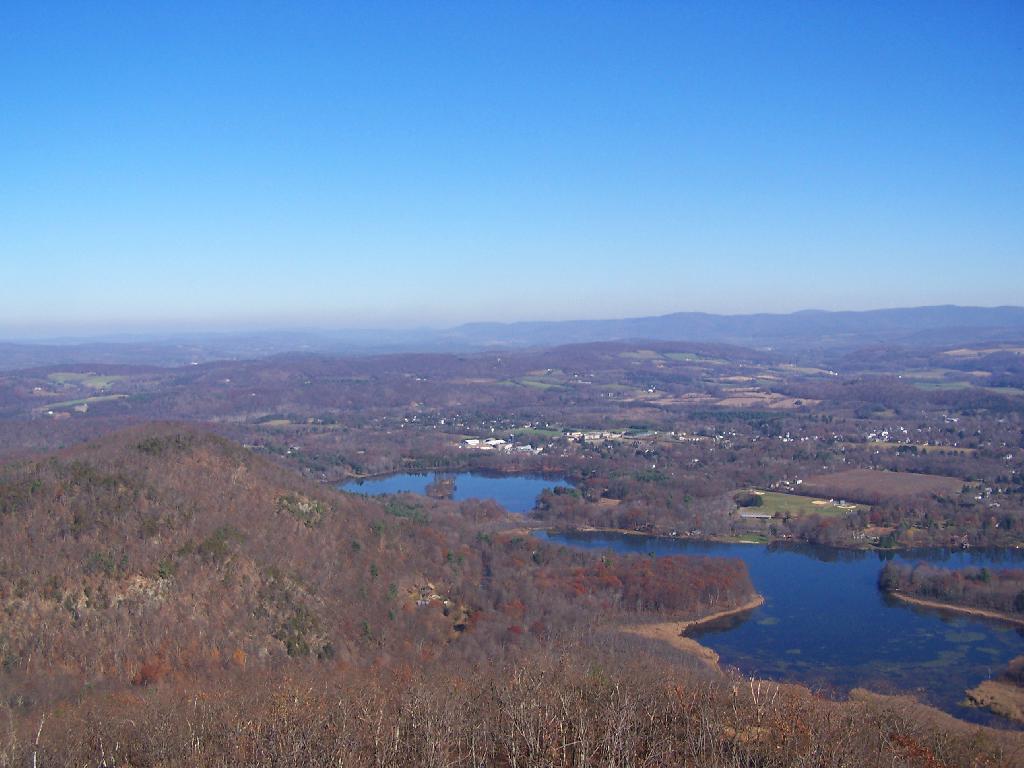
US 219 returns to being steep, windy, and narrow as you head into West Virigina and start climbing through the Blue Ridge Mountains. Actually, it gets narrow with sharp turns in MarylandΒ  before you quietly cross – almost unannounced in West Virgina. The road is incredibly narrow, curvey, and steep climbing through the mountains. You think you’d never make it there, and eventually your in Thomas, WV. It seems like Thomas was a really hoping touristy place this Columbus Day Weekend, but as far as I could tell it lacked most of the chain stores. They probably are in a more populated place. Just down the road is Davis, WV. Davis has a bit more of a main street, it reminds me a lot of Lake Placid minus of course the Olympic tracks. Bought gas in Davis, one of those stations you have to go inside. I was hoping to hear the clerk’s strong West Virgina accent, but she didn’t have much of one. One of the older people in the store certainly had a classic West Virgina/Southern accent though. From there I took West Virgina 32 to the first major forest road I saw on map – FR 13 which runs along the top of Canaan Mountain. It was farthest north forest road of significance along the way, so I figured it was worth a try.

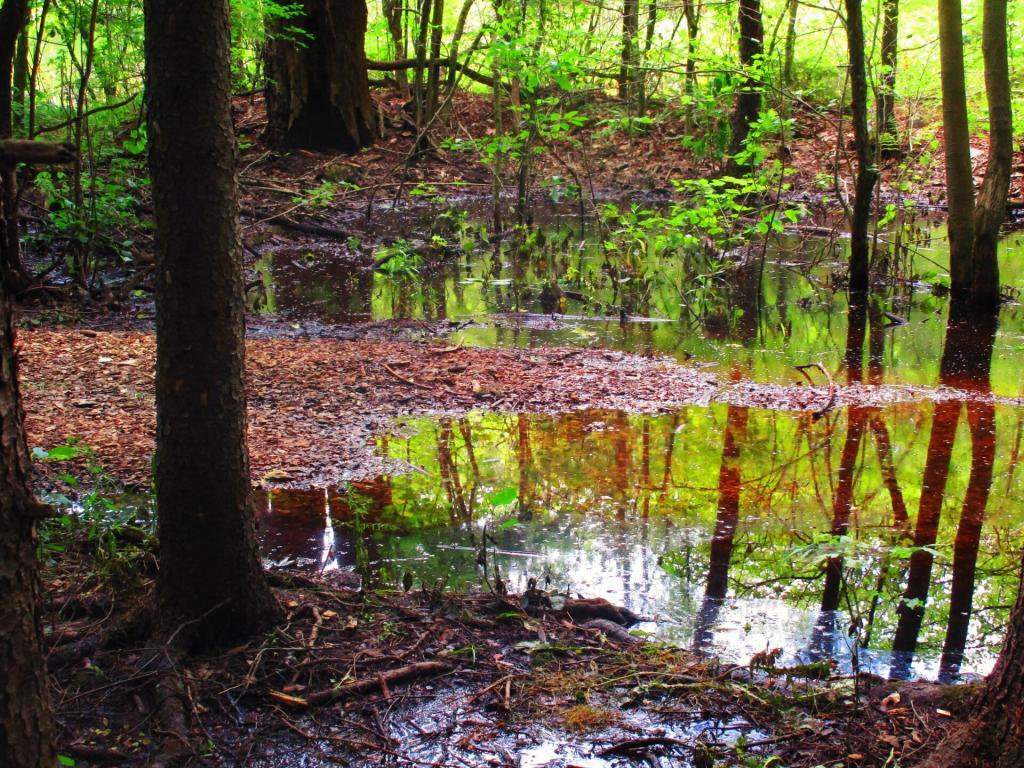
Forest Road 13, besides the unlucky number is astoundingly beautiful with marshlands and the kind of marshy forest you would associate with Dolly Sods Wilderness to the east of this area. Not a lot of maples of deciduous trees up on the top of the Canaan Mountain, but as you head down Forest Road 13, it descends into a deep hollow, following along a creek. Lots of colors from the hardwoods in this valley. This portion of Forest Road 13 is a bit scary to drive, because it’s only one lane wide, and difficult if not impossible in many portion for two cars to pass. Get too far off the road, and you could roll your truck, and assuming you don’t hit a tree, fall 100 feet or more into the hollow. A good gravel road, but so narrow once you down by the stream.

Put the truck in 4×4 low on the way back up the hill in case I had to crawl past a car on the way back up. Fortunately, I did not. Of course, when I got to camp I wanted to take the truck out of 4×4 low. Almost had a heart attack when I couldn’t get the transfer case to switch back to high. I forgot to go from 4×4 low to 4×4 high (and two-wheel drive), you have to have the truck in neutral when you hit the lever, otherwise nothing happens. I thought I was going to get stuck only being able to crawl somewheres, and have to find out what kind of services I could get by flagging down some random person. Literally had to get out the manual to find the answer – I knew there was a procedure, and they recommended you have the truck rolling when you switched – but forgot you had to be in neutral before shifting the case.

A few miles up Forest Road 13 from where I was camping was a big military encampment – there are like 50 brown Silverado pickups with brushguards parked up there. I thought it was Forest Service personal trucks – a big group for sure – but the rear plates said US Army. The guys I saw appeared to be military too. I don’t know if it’s military training or maybe it’s one of the groups that comes up here searching for old unexploded bombs that are occassionally found in the forest (the US Army used this area for war games and testing bombs during World War II). They are tent camping. I guess this must be part of wilderness training of some sort. Not something you would think you would find in the forest for sure.

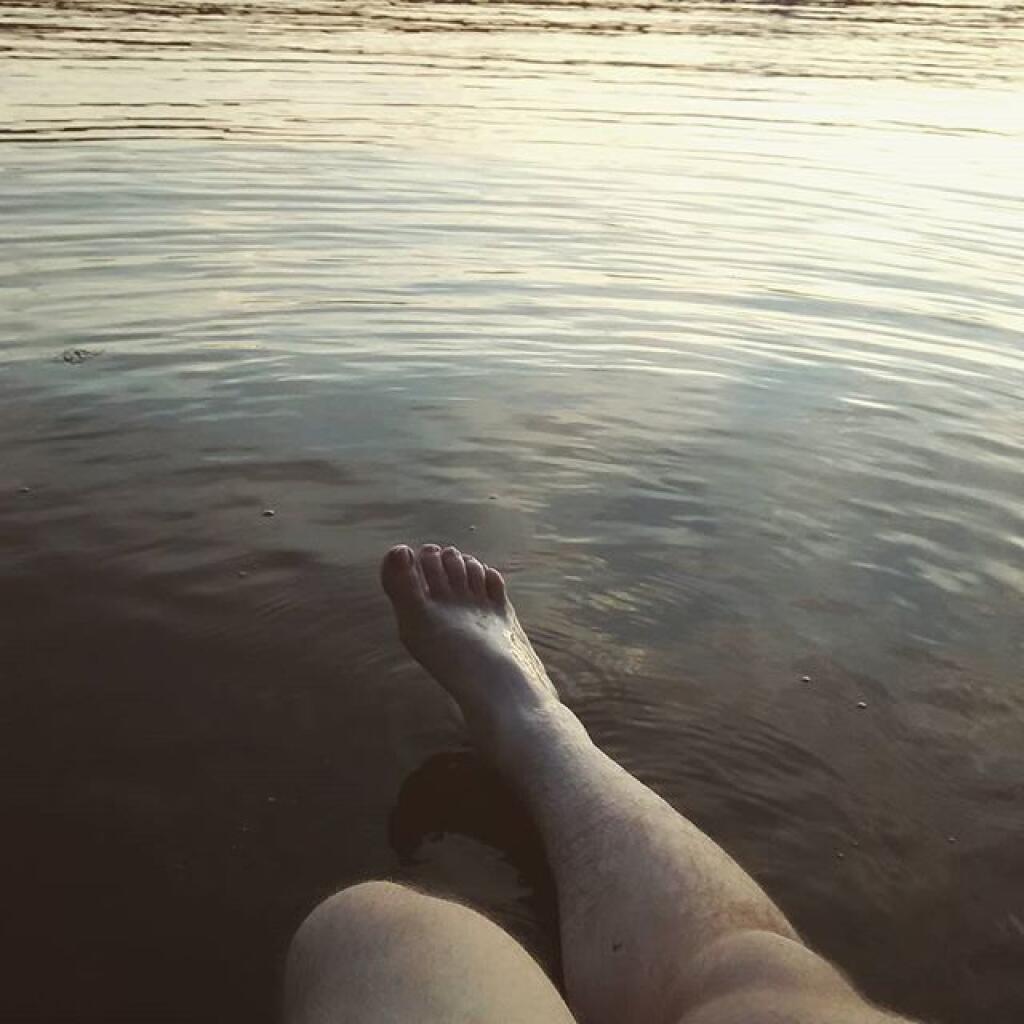
On the way down into the valley, I spotted two campsites that were definite possibility for camping. I ended up camping for the night at one of the campsites, under starry skies. I don’t think the stars are quite as good here as the southern Allegheny National Forest, because we get some light pollution from the Washington DC metro area out here, but still much better then most of Upstate NY. A fairly big open campsite, but that was fine as I had extension cords to reach the lights where they needed to be on the trees. Reheated pork roast from a previous trip on the grill then started a fire. It was delicous and a nice evening. The sunset here is similar to that of the Allegheny National Forest – while I am 250 miles farther south, on the whole I’m jut as far west. Before dusk, somebody from Virgina stopped by to ask for directions to an overlook. I was shocked somebody would ask me, a New Yorker for directions. I guess like I must look like I’m from West Virgina with my big jacked up truck.

Sorry this is a long post, but it was a long day with a lot of adventures and stories to tell. I’m sure I will have more for tomorrow. At least I don’t have to drive any long distances tomorrow, as that US 219 got tiring with all the winding narrow road. I won’t be taking US 219 back north to Pennsylvania. It’s one of these roads you want to take once to see what the countryside is like, then avoid it because it’s so pokey, narrow, twisty, and steep. I probably will take US 220 up to I-99 and then overnight next Saturday night in Wellsboro in Grand Canyon Country, assuming the weather is good. I guess I could drive all the way back in Albany via I-81 / I-88 but that’s a hell of a trip in one day. I want to stay over somewheres in Pennsylvania on the way back, and I’d prefer to avoid the cities that I-81 runs through (Harrisburg, Scranton, among others).

New Theme for the Blog. Central Vermont/Green Mountains This Extended Weekend. Lift Kits vs Other Toys. Getting off the Grid.

Good Morning! Happy Wednesday.Β Yes, folks it’s Wednesday. I think this is the first note I’ve done in a few months, but so be it. It really isn’t that hard to do notes, especially now that I’ve switched WordPress, and everything is pretty much standardized and easy to use. It’s a long one, jotted down over the past week,w with lots of things to talk about.

Working on a New WordPress Theme for the Blog. When I brought the blog over to WordPress, my intent was not to create another generic looking WordPress blog, although in many ways that’s how it ended up. I also messed up some of the code, and didn’t build a proper client theme, instead relying on an adapted theme.

The result was a kind of bland mess. The good news is I am now learning how to build a proper client theme on top of an existing, much nicer WordPress theme — that doesn’t look so much like a generic WordPress theme. One of the reasons I avoided for so long going with WordPress, as I didn’t want to end up with a very generic theme. But somehow it all ended up that way. I think the new theme I am going to — based on the popular Pinboard theme is much nicer.

Hopefully it will be up by the start of September, if all goes well. New maps up are on the blog today.

Sitting in the river until it get really dark

Heading Up to the Northern Half of Green Mountains this Weekend.Β Probably leave Friday after work, first camp in the Southern Green Mountains near Somerset Reservior, then head North on Vermont 100. Β There looks to be a lot of neat places to see in the northern Green Mountains, Β and some spectular scenery.

Plan to stay for a long weekend, by also taking off Monday and Tuesday, which promise to be pretty nice weather. As I don’t really know the area, a lot of the trip will be about seeing what is up there, and going from there to figure out what to do. I will bring the kayak and camera, and certainly are keeping my mind open to taking a nice hike somewheres. They are talking about a continuation of the recent low-humidity, temperate climate weather over the weekend, especially as we head into Monday and Tuesday. Supposed to be some good meteor showers.

I’ve decided to do more of these long weekends, rather then take any full weeks off this summer. I guess you could say the July 4th week was technically a week off, although actually July 4th and July 5th were holidays at the office, so they didn’t really count.

I might take a week-long trip in October to Western NY and Pennsylvania during peak foliage season. That said, I also want to do an extended weekend trip to Moose River Plains and also Lake Kushaqua/Jones Pond and recently re-opened Loon Mountain firetower.

Going to Put Off Getting the Lift-Kit Installed Until at Least March.Β Originally the plan was to have a lift-kit installed on my truck in October. But after giving it more thought, and carefully reviewing the options, I’ve decided the best option is to wait another six months or so. For one, I want to wear down the stock tires more, so I’m not wasting them as much, and also so I’m a bit closer to end of the factory warranty — the lift kit isn’t covered by the truck’s factory warranty, and while it wouldn’t invalidate the whole warranty, certainly any damage (as unlikely as it is) it could cause wouldn’t be warrantied.

But the other part of the rational is partly money-wise, and because I’m not totally sold on the lift-kit idea. I’ve thought about getting Β a snowmobile instead this winter, and have been looking at Want Ad Digest. That said, the more I look at it, the more I am not in a rush to get a snowmobile. As much fun as it would be to get deep in the back country in winter — assuming there are groomed trails back there — I worry about break downs and the alike. Not to mention, snowmobiles use a lot of gas, and really aren’t much more efficient then automobiles, because the snow drags them down.

The money-wise issue comes in that things are more expensive then I first estimated a year ago. I think I am going to go with 35s and a 6″ lift kit from a good brand like BDS. Any bigger then that isn’t cost-effective, and non-pratical. That will get me up high enough. The final increase in the height of the truck will be something like 8 inches, because the 35s are 4 inches larger in diameter then factory 31s, and a six-inch lift is half foot higher.

31626460002_large

I also think I will go for full-leaf replacements in the back rather then add-a-leafs, to ensure the weight of the camper shell and equipment in the back won’t cause the nose to be pointing in the air, etc. Going to have it re-geared to save fuel, add some more power, not kill the engine or tranny. And there are some other things like the narrower brake lines that are recommended, among other parts, I would probably spring for when it comes to lift-kit. Plus all that labor cost, which will easily be a grand on it’s own.

I want to ride up higher. I am a tall guy. It also will give me a chance to “freshen” up the look of my truck, which after 2 1/2 years will be getting kind of boring and old. I want something I can get 10 years or more out of without getting totally bored with. After I do the lift kit, there are other projects for future years, such as getting the rocker panels Line-X’d, and replacing the bumpers with those awesome Ranch bumpers, that can actually be used for parallel parking without being damaged.

Or maybe I’ll find other toys to spend my money on. It’s good having some extra disposable money kicking around, as I’m sure future jobs won’t nearly pay as much.

Been Reading and Watching More Videos About Getting Off the Grid. Being somebody who camps most weekends from April to November in the back of my pickup truck, and relies heavily on my inverter and the deep cycle battery to keep things lighted up all evening long. I cook my own food in the woods, clean dishes using bottled water, burn my garbage, and dig a whole in Β woods when I need to go to the bathroom. Heck, with my laptop and the wireless card, I can be up in woods and surfing the web, doing work, and even fielding calls over my cellphone.

I have a pretty decent working understanding of electricity, and how all the off-the-grid thing too. I grew up in the country, are comfortable in woods, and know how to build a good fire in woodstove. I am fascinated to learn more about some of the relatively inexpensive and simplistic living arrangement many-off-the-griders live with, without all costs and hassles of an on-grid house.

My grandfather had one of those absorption-cooler refigerators/freezers in his RV at his campsite in Warrensburg. They’re neat, as one needs more then just a cooler when you live somewhere permanently, rather then wondering the wilderness in your pickup truck. They burn like 5-10 gallons of propane a month. But there also is these high-efficiency refrigerators that are electric and have a lot of insulation, so they don’t strain batteries in a PV/micro-hydro/wind system as much.

But a bigger issue for me is the ability to take showers and get cleaned up properly wherever I live. For that purpose, there are amazingly small tankless-water heaters that use a small amount of propane, but can get water very hot quickly. If you think small, you don’t really need that much flow, compared to a full-scale modern house with a massive-tanked water heater. Hot showers, and hot water for dishes is a necessity to keep clean. If I can get away with it from the code inspectors, I’d be fine with composting toilets or even just a plain old outhouse. That’s a luxury in woods.

Woodstoves, radiant flooring, and other familiar technology is self-explanatory. Having good insulation is a must in this part of the country. I don’t want to have trash pickup — I’m happy enough burning what can be burnt, and taking the glass and metals for proper recycling in the normal industrial fashion.

I like small houses. Smaller is better. I would rather spend my money on land, that could not only be used for recreation like riding quads, shooting guns, and hunting, but also for money by grazing livestock and timber. I am not a greeny, I don’t got a problem with using styrofoam plates for dinner and disposing them in an open fire. I just hate the whole upper-middle class, fancy house living style in the suburbs.

All this reading library books gots me thinking …

But for now I’m fine. As a transition though, I think I would next like to live in a small, handsome, downtown, one that is walkable to a bar and a store, but also provides ample-off-street parking. I think it would be a lot of fun to have an apartment on the second or third floor, above a shop, and be able to sit out and look at my window and watch the traffic go by.

Anywhere I live, I want to be near a National Forest or State Forest that allows free, primitive camping, in a remote-roadside fashion. Not to mention scenic vistas, places to hunt, fish, hike, and spend time outdoors. But I really want to get out of New York, at least eventually. I think it would be fun to own an AR-15, and eventually get a concealed carry permit from a must-issue state, without any pesky questions about whatever stupid things I did decades ago back in college — that hurt nothing but folks egos. To say nothing of not being in a state that’s totally anti-rural and not into the philosophical nature thing.

Far off I guess. Things aren’t that bad right now.

Making Maps of Round Lake Wilderness in QGIS

You are thinking about going to the Round Lake Wilderness for a Canoe Trip. You would like a map, but don’t want to spend $10 bucks to buy one, when you get a better looking map for free with more accurate data from the NYS Department of Environmental Conservation and NYS Department of Transportation, using a free GIS program known as Quantum GIS or “QGIS” for short. When you are done with this tutorial, you will end up with a map that looks like this.

Fermented

QGIS like all GIS programs can seamlessly glue together multiple topographic quadrangles (such as the Sabbist and Little Tupper Lake quads needed for this map), and then superimpose campsites, trails, and other data you need β€” that might not be available on a typical topographic map. As your printing your own map, you don’t have to worry about keeping it dry or keeping it from getting damaged.

All GIS software is highly technical and a bit complicated to use. Putting together a good map is a fair bit of work, but once you master it, you will be able to put together quite nice looking maps. I hope this rather length fodder article will send you on your way to making good maps of NY State.

Step 1: Download and Install QGIS.

First you need to download a free copy of the open-source Quantum GIS program from QGIS.org. It runs on Windows, Linux, or Mac OS X and is relatively easy to install. Then open QGIS on up. It will look something like this, depending how many plugins you have installed and your version of QGIS.

Hint: Save your work regularly when working in QGIS by going to File -> Save Project menu. It’s always good to save regularly in any GIS program, as your dealing with large files, and its always possible that QGIS could crash, and you would lose your work.

Step 2: NYS DOT Topographic Index.

Next, you will need to get some data to fill up that blank screen. You will probably want to go the NYS GIS website and download the 7.5 minute topographic index (aka 1:24,000 scaled topographic maps). This “Shapefile” β€” a file containing data used to draw shapes, dots, or lines in a Geographic Information System (GIS) program β€” contains an overview map of NY State, with boxes representing each of the 965 7.5 minute topographic maps that make up NY State.

NY 1:24,000 Topographic Map Coverage Index Shapefile. (90 KB) Contains the outlines of all 965 7.5′ topographic maps in NY State. Freely available from NYSGIS Website, under the Digital Raster Quadrangles.

Download, expand, and open the NYSDOT Topographic Map. You can open it in QGIS by using Vector -> Add Vector Layer.

7.5 minute topographic maps are the most accurate topographic maps typically available. The NYS Department of Transportation provides high-resolution, 509 DPI, scans of all 965 topographic maps it creates. Each scanned in map is in a file called a “GeoTIFF”, and is divided into 3 or four files, consisting of each color used on a standard DOT topographic map.

Step 3: Projection.

It’s Very Confusing, BUT VERY IMPORTANT!!

When you load that 7.5 minute topographic index into QGIS, you might be surprised to see how that map is distorted, and does not look like the map above. This is because the earth is not a flat surface, and there are many ways to draw a map of the earth, to reflect the curvature of the earth. We call that the projection of the map β€” how we project a curved surface on a flat sheet of paper or a flat screen.

There are actually thousands of ways to project the surface of the earth, such as unprojected latitude and longitude (called WGS84) that squashes north and south on maps, regular Mercator which puts things on an even latitude or longitude on a flat plain (NY State appears with a flat border along Pennsylvania at the 42nd parallel), and Universal Transverse Mercator (UTM), which most accurately shows distance and relative position of items, at the cost of over distance appearing somewhat distorted.

For all your New York State mapping projects, you are only going to use one projection β€” Universal Transverse Mercator (UTM) Zone 18. This is one set in official state regulations as what all state agencies are supposed to use, and it’s what NYSDOT Topographic maps are drawn in. For your adventures in making maps for hiking, camping, hunting, fishing, and boating, your going to want to always use NAD83 / UTM Zone 18N in NY State.

Go to File -> Project Properties, and click on the Coordinate Reference System (CRS) tab. Browse through the list for NAD 83 / UTM Zone 18N. Click on “Enable ‘On the Fly CRS Transformation”.

Clarification. Then click the triangle next to Projected Coordinate Systems, then click the triangle next to Universal Transverse Mercator, then scroll down to NAD 83 / UTM Zone 18N (ESPG:26918). Alternatively on the search box on that same page, search for Authority: All, Search for: ID, and enter in 26918. QGIS will remember your settings and default to this projection for future projects.

To ensure everything is projected in NAD 83 / UTM 18N, make sure to Enable ‘On the Fly’ CRS Transformation. QGIS will automatically convert “Shapefiles” and other vector data into the proper projection. QGIS can not do this for scanned in images or similar “raster” data.

Check and recheck to make sure you did this projection step correctly. Otherwise, you will get messed up maps, and you will get lost. Confusing, definitely but the most important step.

Step 4: Now Let’s Load Some Data.

Shapefiles and vector data are all loaded in the same way. You download the file, expand it, and load it into QGIS. Here are some Shapefiles I recommend you download and load into QGIS:

DEC Lands Outlines Shapefile. (5.4 MB) Contains the outlines of all lands under the control and jurisdiction of the Department of Environmental Conservation. Does not include Town Parks, Canal Authority Parks, Parks Maintained by Office of Parks, Recreation, and Historic Preservation. Also does not include Conservation Easements. Freely available from NYSGIS Website, under the DEC Section.

DEC Roads and Trails Shapefile. (5.8 MB) Contains many of the roads and trails maintained by the DEC. Does not include local, county, or state roads, and in some regions of state, there is no trail data available. Freely available from NYSGIS Website, under the DEC Section.

DEC Physical Assets Shapefile. (0.2 MB) Contains many of the physical facilities maintained by DEC β€” specifically lean-tos, back country campsites, boat launches, fishing docks, firetowers, etc. This is available using a Freedom of Information Law Request. The DEC will send it to you in 5 days, if you email the Records Access Officer. I have put a copy of this file on my blog, of the exact form I got it back from the DEC, to allow you to avoid unnecessary FOIL requests.

OpenStreet Map: NY State Shapefile. (105 MB) I found this some time ago on a now defunct website and have made several modifications to it over the years. It is freely available data, originally based on US Census TIGER lines, but with certain modifications, such as removing certain roads from wilderness areas. One should consider it public domain as it’s just US Census data, and you are free to edit and redistribute it. You can download my copy from this blog.

Once you load the data into QGIS you should be able to zoom in and explore the map, and get a general idea of what area you are interested. The random colors chosen by QGIS to display this data are pretty hideous, but we will change them in a bit.

Zoom into the area you interested in, by looking at the general outlines of the public lands. You can use the maganifying glass to zoom in, the hand to move around, and the cursor next to the (i) icon, to display information about various features.

Step 5: NYSDOT Topographic Maps.

Next we need to figure what NY State Department of Transportation (NYSDOT) 7.5″ topographic maps we will need to make a “base” map of Round Lake. Click the cursor next to the (i) icon, then onto the the map, where you need to figure out what topographic map you want. As I see from the results, I will need the Sabbatist Quadrangle (among 4 others nearby), which is available from NYSGIS.

NYSDOT Topographic GeoTIFFs at 1:24,000 Scale. (2 MB per quad) There are 965 quads in NY State. The NYSDOT topos have the most up to date roads on them, and come with each color layer seperate. The average file is about 2 MB. I downloaded the whole set from their FTP site, but you can download only the ones you need at first, but having the full set sure is convient.

NYSDOT Topographic Maps are scanned at 508 DPI, and are georeferenced NAD 83 / UTM 18N GeoTIFF images, that QGIS will automatically position on map for you to create a seamless map across data layers, as long as you properly set the projection in QGIS in Step 2. Maps will line up perfectly, even a certain map consists of many different quadrangles.

I do not recommend the USGS Digital Raster Graphic (DRG) Quadrangles. They are typically older, use the obsolete UTM 18 / NAD 27 coordinate system, and do not have individual files for each color layer. Moreover, the 1:100,000 Digital Raster Quadrangles and 1:250,000 Digital Raster Quadrangles, do not have the needed resolution (detail) for doing hiking or other outdoor maps. If your doing a broad overview maps β€” like for spotting peaks off a firetower, they might be useful, but not for general use.

Each NYSDOT Topographic Map consists of 4 different black and white GeoTIFF images. There is no transparency data in this maps, nor any color in them. You are free to set transparency or color as you please. They are as follows:

  • plan – Man made features and labels such as roads or mountain names. May also include unnavigable streams, borders on lakes, etc. Anything that would be printed black on the NYSDOT topographic map.
  • hyd – Lakes and navigable waterways. Anything that would be printed light blue on the NYSDOT topographic map.
  • topo – Topographic lines showing general elevation and slope. Anything that would be printed light brown (color of topographic lines) on the NYSDOT topographic map
  • bua – Built Up Area, background. Areas that have a lot of development, such as cities. Anything that would be printed light pink or yellow on a NYSDOT topographic map. I usually don’t use this layer, not found in rural quads.

You can load them using the Layer Menu -> Add Raster Layer, menu item. Using the control key, you can load multiple files at one. I try to load all the layers I will need at once, as it can take time to load layers, and it’s good to get it done at once.

Remember, these are scanned in images or pictures of the topographic maps, they can not be easily edited or queried in QGIS. Zoom in too far, and they become pixelated. Yet, they usually provide an excellent back drop for outdoors maps.

When you first load one of these maps, you will see a picture like this. The topographic layers for some reason chose to load first, and appear on top, and with no color or transparency set, they are pretty useless out of the box.

Typically you will want to arrange the topographic layers, so that the plan layers are on top, followed by the hyd layers, then the topo layers, and finally the bua layers. With the plan layer up top, the map will start to make a little bit more sense, give you a better idea if you loaded the proper quads.

Next you will want to go through every GeoTIFF Topographic Map layer you have uploaded, and change white to transparent. You do this by right clicking on each layer, and choosing Properties. Then click on the Transparency tab in the Layers Properties dialog that comes up.

Double click on -32768.00 on the Indexed Value column, and change it to 0. This will make all white portions of the map 100% transparent. NYSDOT Topographic Maps do not contain any useful transparency data, so you will want to make all white areas in the map transparent.

If you are working on a hyd layer, topo layer, or bua layer, you will want to go the color map layer, and change the color for value 1.00000 by double clicking on the color next to it. Black is the default color, but that isn’t helpful except for the plan layer. You need not change the 0.0000 color, as you have already set that to be transparent, and it will not be visible on the map.

Then click OK, and the dialog will close, and transparency and colors will be visible on the map layer you just changed. Besides those awful background colors, the map that is being displayed starts to look a lot more useful now.

Right click on NYS_QuadIndex and choose Properties. Go to the Style tab. While we really do not have to use this layer any more, and could just disable it by unchecking it, I like to use it as a yellow background to indicate non-DEC lands on a map. To do this, click on the color box next to Fill Options, and set it to light yellow, as I did, or whatever color you want to represent private lands. Then go to Outline Options and choose an invisible line, to hide the quad boundaries.

It’s now starting to look a little better.

Now it we do the same with DEC Lands Outlines, setting it white or whatever color you prefer. Make sure it’s dragged above NYS Quad Index on the Layers, but below the Topographic Maps. I prefer no borders to be shown, as I find DEC boundaries to be confusing, as often Wilderness borders Wild Forest or Primitive Areas, leading to strange lines appearing in the maps. If you care about such borders, do leave them on though.

Now you got a map that is almost ready for use, that is once we delete roads that we know don’t really exist in a wilderness area, stylize campsites versus other facilities, stylize roads versus hiking trails, and maybe add some labels.

Step 6: Stylizing Roads versus Trails.

I like to make hiking trails a dashed black line of 0.75 map units, and roads a solid black line of 0.75 map units. This ensures on black and white printers one can tell the difference. To do this, right click on DEC Road and Trails, then the Style tab. From here, choose Unique Value from Legend Type.

We will use the MOTORV field to decide if something is a road or a hiking trail. Obviously, if this was a winter map, we might change this field to SNOWMOBILE or X-COUNTRY SKI. This field contains, ‘Y’, ‘N’, ‘M’, ‘U’, and sometimes ‘YES’, ‘NO’, depending on the forest ranger that inputed the data. Set the style as you wish.

Choose classification field MOTORV, then click the classify button. All of the different possibilities for roads or trails allowing motor vehicles will be shown. From there, set the colors and line styles as you so choose.

Step 7: Removing Invalid Roads from NYS Highways Shapefile.

If you use the OpenStreet Map Highway file future on the page, you will see it often has lines that overlap DEC hiking and truck trails, and has old woods roads or other invalid data, that you will need to delete to clean up your map, and avoid confusing users. It’s pretty safe to delete all highways from Wilderness-areas, unless you are sure that such a road actually exists.

You need to right click on New York Highways Shapefile, and choose Toggle Editing. A pencil will appear next to that layer. Then use the select tool on the second toolbar, in the upper left (selected in box below). Highlight the streets you want to delete, and they will appear yellow.

Use the Delete Selected button to delete the roads you have highlighted. Notice buttons nearby that allow you to split features into multiple features. These are helpful if you know only part of a road has been closed or abandoned, and you want to remove only part of the road from your map.

I zoomed in on Round Lake to search for other invalid roads I wanted to remove. Looks okay now, although I still question some of those roads located in Whitney Headquarters. Having not been there, I can not say which ones have been gated or abandoned, so I will leave them on for now. Right click on the NY Highways Layer to save your changes to that Shapefile.

Step 8: Stylizing Assets.

Next we need to change the various DEC Physical Assets from a single color dot, to icons that represent the asset. With the current map, we can not tell the difference between a campsite, a parking area, or trail register. This could be rather confusing for anyone using our map.

This is very similar to changing the symbols for roads versus hiking trails in the previous step. Go back to the properties dialog. This time, we want to stylize things based on Unique Value, then Classification field Asset. Then, click Classify. This will create unique color for each icon. By browsing the “Point Symbol”, you can now give primitive campsites proper looking icons. Don’t forget to set the size. I usually set icons at Size 3.0 or 4.0, but it varies a lot on the final scale of the map.

Finally, I zoomed in to check on my work. Wit the icons set, we have a pretty nice looking map. I can spot the campsites, parking areas, trails, and the private property-public lands boundaries. I know where to put in my kayak, to explore Round Lake. It’s too bad, I don’t know which if any roads to remove from Whitney Headquarters, so I’ll have to go in person if I want to correct the map.

Step 9: Adding Labels to Trails and Roads.

Yet, I would also like to see some names on the roads and trails. Select the DEC Trails layer. Go to Layers menu and choose Labeling. From here, click Label This Layer, then choose Fields with Labels and select Name. The default style of 12 point fonts is almost always too large for most maps, a font size between 5 to 7 points is what you mostly likely will use. Then select, Buffer to create a small white background around each label. This is usually necessary to make your labels appear readable on the map.

Then click the Advanced tab. The default placement for labels is Parallel, which labels the largest amount of items, but doesn’t look very pretty. Curved is the prettiest, but it will not label particularly twisty lines. Priority controls which labels are most important if you have multiple layered roads. I usually set NYS Highway Shapefile to a low priority as the underlying topos usually also have road names, and trails to a much higher priority.

So now you should be set with labels. You have to do this with each layer with labels, such as the NYS Highways layer. You can do this also with the assets layers, although I generally do not bother, as I don’t really care about the sometimes lengthy names the DEC gives campsites.

Step 10: Printing and Making Images to Export.

Looking at a map in QGIS is kind of fun, but pretty useless when your on the trail. Go to File -> New Print Composer. A dialog like this will appear.

Next, you will want to change the paper size to something more reasonable then A4. Most likely you’ll choose Letter-sized paper. Below that set the resolution. Choose the orientation most appropriate for your map, I often use Landscape. To get high quality map print outs, you will want to set the the quality box somewheres between 300 to 500 dpi. Even if you are just exporting as a picture, it is good to preserve the resolution for future printing.

Then click on the canvas icon (circled in blue), to draw the surface the map on your canvas. This will provide you a canvas to draw on your page surface. You may wish to click “Snap to Grid” and set “Spacing to 5.0” to make it easier to line the canvas up. Click the magnifying glass, with the plus sign or the icon directly to the left of it, to expand the window so it’s easier to work on the canvas. This doesn’t change output, only the display on the screen.

Next, click Item tab, and then the Extents label. This will bring up the map extent box. The extents of the map will be listed in Northing and Easting, a series of large numbers that tell you how many meters you are North and East of the Greenwich, England. This is the standard form of measurement used by the Universal Transverse Mercator positioning system. Just click, “Set to Map Canvas Extent”.

Click Map. You can use the Earth on Hand Tool (circled blue on this screenshot), to move around the image on the map. Then you can go to the scale box, and adjust the zoom. Smaller numbers mean more zoom in. A standard topographic map is at 1:24,000 scale, however, I generally prefer a scale of 1:18,000 or so to make the map more readable. If you zoom in too far, the topographic map β€” a raster map, will become pixalated. In addition, if you zoom in too far in or out, you will have to adjust the thickness of trails on the map, and the size of icons.

Scale Bar, Labels.

The labeling tool is fairly self explanatory. It appears like a tag on the top of the screen (circled red). Use it to add labels, such as the name of the map and other details. Set the font, background color, and other options under the Item tab and the various lablels.

More challenging is adding a scale bar. Draw it using the scale bar tool (circled in green). The big hint here is that topographic maps are projected in Universal Transverse Mercator or UTM, which is a metric system. Each map unit is equal to one meter. Chances are you don’t care about kilometers. Set Map units per bar unit to 1610, which is roughly 1610 meters per mile. There are actually closer to 1609 meters per mile, but you will never notice the difference, as the map is at too large of a scale to notice that extra meter.

Then set the Segment size (map units) to a fraction of 1610. I typically do maps at 1:18,000 scale, so a segment size of 402.5, which is equal to 402.5 meters or 1/4 mile works perfectly. For larger maps, you’ll want to use a segment size of 805 meters (1/2 mile), or maybe even 1610 meters (1 mile).

Below Map units per bar unit is 4 Right segments and 0 Left segments. Set them as you please, but if your doing a 1/4 mile per segment scale, then the default of 4 usually works well.

Finally, don’t forget to type in a unit label. This doesn’t effect anything, but it’s nice for the user of the map to know what the scale is done in.

Step 11: Printing or Saving.

Most of the time you’ll want to save your map as a JPEG image, that you can open up at any time easily, add to a Microsoft Word document, email to friends, or print at a later time. I circled the save as an image button with a yellow circle. Assuming, you set the resolution sufficiently detailed (such as 300-500 DPI), you’ll get an excellent print out later on. Save your image and your done.

Alternatively, you can print directly from QGIS. I circled the print icon with red. I do not recommend this option, as it’s a pain to have to open up the saved QGIS project, and then the open print composer, every time you need a particular map, compared to having it saved. Even on fast computers, loading QGIS can take a bit of time to load and navigate.

Conclusions.

Fermented

If all goes well, you should end up with a map that looks like this map. Your styling choices may be different, but you will still know where to put your kayak out, when going up to Round Lake in the Round Lake Wilderness, and the location of all the campsites.

I appologize if I missed any major steps. There are a lot more you can do with QGIS, but I wanted to cover the major steps, and provide hints for some of the things I found most confusing about using QGIS when I started using it regularly about a year ago now. I hope this is helpful. β€” Andy

11 Fire Towers I Visted In 2009, Part 2

This past year I have spent a great deal of time hiking up mountains and visiting fire towers. Here are pictures of the second five fire towers I visited this year, along with a short description and maps in the second part of this series.

Make sure to all check out Eleven Fire Towers I’ve Visited This Year, Part 1 featured on Monday, November 16, 2009.

June 29, 2009 & June 30, 2009:
Sugar Hill Fire Tower

The Sixth Tower I visited, was Sugar Hill State Forest / Horse Camp is located outside of Watkins Glen. It’s an equestrian facility with 50 miles of trail, along with a small hiking/no horses area. They have free camping, and 3 equestrian lean-tos and one hiker lean-to on the Finger Lakes Trail. A definitely cool place to visit if your in the Finger Lakes.

Information and Pictures from my visit to Sugar Hill State Horse Camp.

Firetower

Six Nations Horse Camp


View Hikes of 2009 in a larger map

July 11, 2009:
Red Hill Fire Tower

The seventh tower I visited, Red Hill Fire Tower is located south west of the Catskills, barely in the park, with views of the south-western Catskills, the High Peaks, and down towards the Delaware River in Pennsylvania.

Information and Pictures from my hike up Red Hill.

Tower Closed

Doubletop Mountain


View Hikes of 2009 in a larger map

August 8, 2009:
Balsam Lake Fire Tower

The Eightieth Tower I visited, was Balsam Lake Fire Tower is located in about 10 miles south east of Margretville in a very rural portion of the Catskill Mountains. It is the only tower in the Catskills actively staffed by DEC Fire Rangers on weekend (mostly acting as guides).

Information and Pictures from my hike up Balsam Lake Mountain.

Balsam Lake Firetower

Flag on Tower


View Hikes of 2009 in a larger map

August 7, 2009 & October 10, 2009:
Leonard Hill Fire Tower

The Nineth Tower, Leonard Hill Fire Tower is currently inaccessible, pending renovation. They have removed the bottom to flight of stairs to discourage people from climbing the tower. That said, the DEC Forest Ranger has cleared out a camp site/viewing area directly to the west of the Tower for those who want to enjoy the amazing view due west of the Western Catskills and Upper Schoharie Valley.

Information and Pictures from my trips to Leonard Hill.

The Tower

Clouds Over a Fall Landscape


View Hikes of 2009 in a larger map

October 11, 2009 & October 12, 2009:
Mount Utsayantha Fire Tower

Mout Utsayantha was the Tenth Tower I visited. This fire tower is on a public village park, above Stamford, NY. You can drive right up to it — I visted it twice one weekend. It gives you amazing views of the western Catskills, the area around Summit and Emmenece State Forest, the Upper Schoharie Valley, and on clear days out towards Oneonta.

Information and Pictures from my trips to Mount Utsayantha.

Tower Mountain Road

Colorful Hill


View Hikes of 2009 in a larger map

November 8, 2009:
Stissing Fire Tower

The Eleventh Tower: Rising 1,000 feet above the low lands of Pine Plains, this firetower gives you beautiful views of small towns, lakes, farmlands, mountains, and a five state region of the Hudson Valley on clear day.

Information and Pictures from my hike up Stissing Mountain.

Wetlands

Towards Vermont


View Hikes of 2009 in a larger map

April – June:
The First Five Towers.

If you like this, then make sure to see the next five on Eleven Fire Towers I’ve Visited This Year, Part 1.

I have next week off from work β›Ί

Kind of a running list of where things stand and what I need to do to make vacation happen.

It looks like it will be a great week down in West Virginia with lots of sun and temperatures warming up to the upper 60s by the end of the week. Maybe some rain for the drive down on Saturday but even that evening doesn’t look like a wash out. Checked the oil over the weekend, and that was good, I could pick up some pre-mix coolant and top that off just to be safe.

Tonight I’m going to run to Walmart to get some initial supplies and things I need around the apartment. Start packing and getting ready. Been thinking a lot about what I want to cook down there, as food shopping options really are limited in Davis and Thomas high country area and I don’t plan to drive to either Oakland or Elkins mid week if I can avoid it. I was hoping to get ice cream in Davis/Thomas but the one ice cream parlor in the region closed before Columbus Day Weekend. Kind of a bummer as it’s going to be warm by the end of the week. Maybe I can get my fix of pumpkin ice cream on the way back home. Doesn’t have to be fancy — I’m all for vanilla soft-ice cream with a pumpkin dip. I’ll bring some cans of pumpkin puree to have pumpkin with non-fat greek yogurt at camp, plus pumpkin-oatmeal pancakes and pumpkin-oatmeal biquits for my pumpkin fix.

Got to transfer $300 from my rainy day bank account to my main account to keep the balance up and then withdraw $200 in small bills for miscellaneous expenses like campground fees and farm stands on the way down. I get paid next Tuesday but my bank balance is currently fairly low and with rent due along with automated investment and retirement there still will be insufficient funds despite the money coming in. At the end of November though my deferred compensation will max out so that should mean a good boost in pay that will help me catch up again on my bank balance.

I need to print up some maps for some of the areas I’m exploring plus make sure I have cached the forest service and topographic maps on my phone. While I should have service at camp, not all locations will and it’s better to be safe then not have the maps I need. I really plan to GPS and share as much of my trip as possible, including posting tracks of drives, bike rides and hikes along the way. Plus get podcasts to listen to up at camp, especially for the first rainy night where it’s unlikely I’ll have much service.

I want to soak 15 bean soup tonight, make hard boiled eggs and knead bread to bake on Friday afternoon so I have things to eat on the way down and Saturday night without much cooking especially if it turns out Saturday evening is wetter then it’s trending. I also want to get some cider doughnuts to enjoy on the way down, maybe in Oneonta. Hit the hay early Saturday night at camp in Penna and get on the road early Sunday around day break to Cumberland, Maryland.

Sunday looks like the rain will pull out fairly early which is good if I want to spend a few hours exploring the Chesapeake and Ohio Trail in Cumberland on Blackie my mountain bike before heading down to Keyser to top off my propane and do one more supply shop at Walmart before heading up the Allegheny Front and setting up camp in the high country.

Monday is going to be a bit cool but sunny and the rest of the week could very well be t-shirt weather at least by the end of the day with lots of sun. Planning many bike rides and hikes through the week to scenic locations. Want to have many good, delicious and healthy meals to cook even though I won’t have my full oven but I’ll bring my camp oven and Dutch oven. Undecided about the food processor, I could bring it or I might just mill up oatmeal for pancakes and baking in advance.

Then just kind of relax. I want to have fun but not be rushed or trying to see and visit as many places as possible at once. Be able to watch many sun rises and sunsets, have some nice fires, listen to music and podcasts. Take pictures and enjoy the scenery. Eat good healthy meals. Maybe do a bit of bike riding under the moon light, get a craft beer from Mountain State Brewery. Make the most of it before heading back north come the following Saturday.

I Guess Columbus Day Weekend Isn’t a Complete Washout 🌧 πŸ€›πŸ» β›΅ πŸ‚

Totally bummed out about this weekend, but maybe I shouldn’t be. It didn’t rain until quite late into the night and this morning the rain has slackened up quite a bit. Maybe it will be nice enough to go for a bike ride to Voorheesville or Five Rivers — and it might be pretty to check out the Pine Hollow Arboretum which amazingly enough I’ve never been there. Almost rain free-enough to make me wish I had headed out of town to get camping. Maybe tomorrow but it’s likely going to be cold and windy, and probably still damp. We’ll see come the morning, I got to start working on packing and thinking about West Virginia sooner rather then later.

Good morning! Happy Saturday on this rather Rainy Start to Columbus Day Weekend! Rain showers, at least a few drops of rain here and there and 65 degrees in Delmar, NY. ☁ There is a south-southeast breeze at 7 mph. πŸƒ. The dew point is 63 degrees. The skies will clear tomorrow around 10 am.

I slept in until 5:50 AM when my alarm went off ⏰ got up and make oatmeal-banana pancakes to start off my morning. 😡 Lots of coffee β˜• so I waited a while before heading out in case I had to piss up a storm, and ended up deciding bicycling was a safer option lest I needed to pee 🚽 or the sky opened up with rain. β˜”

Today will have showers and possibly a thunderstorm. β›ˆ Some of the storms could produce heavy rain. Temperature falling to around 57 by 5pm. Southeast wind 7 to 9 mph becoming west in the afternoon. Chance of precipitation is 100%. New rainfall amounts between 2 and 3 inches possible. Yeah, even though it’s not raining right now, I’m glad I’m not camping in that kind of crap. That’s a lot of rain. A year ago, we had partly cloudy skies in the morning, remaining cloudy in the afternoon. The high last year was 71 degrees. The record high of 89 was set in 1963.

Solar noon 🌞 is at 12:44 pm with sun having an altitude of 42° from the due south horizon (-28.9° vs. 6/21). A six foot person will cast a 6.7 foot shadow today compared to 2.2 feet on the first day of summer. The golden hour πŸ… starts at 5:51 pm with the sun in the west-southwest (257°). πŸ“Έ The sunset is in the west (263°) with the sun dropping below the horizon at 6:28 pm after setting for 2 minutes and 56 seconds with dusk around 6:55 pm, which is one minute and 43 seconds earlier than yesterday. πŸŒ‡ The best time to look at the stars is after 7:29 pm. At sunset, look for rain 🌧 and temperatures around 56 degrees. The dew point will be 54 degrees. There will be a northwest breeze at 11 mph. Tomorrow will have 11 hours and 27 minutes of daytime, a decrease of 2 minutes and 50 seconds over today.

Tonight will have showers, mainly before 1am. 🌧 Low of 47 degrees at 5am. Two degrees above normal, which is similar to a typical night around October 3rd. Northwest wind around 9 mph. Chance of precipitation is 90%. New precipitation amounts between a quarter and half of an inch possible. In 2022, we had partly cloudy skies. It got down to 38 degrees. The record low of 21 occurred back in 1964.

For tomorrow, Sunday, things may improve. β›… A slight chance of showers before 8am, then a slight chance of showers after noon. Partly sunny, with a high near 59. Southwest wind 8 to 13 mph. Chance of precipitation is 20%. That wind will make it cool but maybe I should plan to do some biking and camping out of town. πŸ• I heard there is some pretty good color in the Catskills. And for Columbus Day, cool but mostly sunny, with a high near 59. South wind around 9 mph. That does seem like an improvement over earlier forecasts. πŸ˜€ My parents are out of town this weekend, so I won’t be visiting them this weekend, so I am kind of free to do whatever I want this weekend both days and I don’t have to rush home. I have enough clothes for the upcoming week for work, as it’s going to be cool and I wore t-shirt and shorts all last week, including the day I was off. πŸ‘– I will have to go to the laundromat later in the week though before I head down to West Virginia. Assuming that’s where I end up — if it looks truly cold and wet for the following week I could change my plans to be closer to home, but regardless I plan to camp for the full week. 🀷‍♂️

I am watching the forecast for both here in Delmar, Wellsboro Penna and Thomas WV, 🌧 and I’m not pleased with how much rain I’m seeing, though 7 days out it really is just a crap shoot. The rain numbers are quite meaningless at this point as so much could change. If it rains on my drive down to WV it’s not the end of the world, I don’t need to take a million different side trips. I’ll skip the Pine Creek Rail Trail πŸš‚ and the C-O Canal Trail 🚲 until later in the week or not at all, and mostly just drive down, and hunker down at camp. 🚘 Once I’m in West Virginia once camp’s set up the rain is less of an issue. Indeed, the 8-14 day outlook suggests especially in West Virginia in the mid-Atlantic states it might be a fairly dry week but cool. 😎 I’ll take that as long as there isn’t snow. ❄️

I will be bringing my heater, and can hot tent if it’s really cold up in Canaan Heights but I want to have sunny days for hiking and bicycling, plus it makes the scenery better. ♨️ β›Ί I hear they’re getting their first likely frost in the high country this weekend, so by next weekend it should still be close to peak color, without the crowds of Columbus Day Weekend. πŸ‘ͺ There is a reason I waited to later this year, plus it seems like autumn is occurring each year a bit later — and the High Country of West Virginia is more like the Hilltowns climate-wise then the mountains of New York due to the more southerly location.

I found my West Virginia maps including the Monongahela National Forest πŸ—Ί along with the Pine Creek Rail Trail and several other Pennsylvania State Parks I may want to visit on the way down assuming it’s not raining. I am going to print up at work a few small scale maps of Canaan Heights and some other trails in the Otter Creek and Dolly Sods Wilderness at work, πŸ–¨ assuming I can find a printer that still works in the office, lol. 🀣 No-ones going to care if I print up like four pages, assuming that the machine still works as nobody prints much anymore work-related. Then it’s just clothes and supplies to pack for camping. I will bring a fair amount of food with me, but only one cooler as it will be cool enough that most fruits and vegetables don’t need cooling, and I don’t eat nearly as much meat and dairy as I once did. πŸ₯© πŸ₯› I’m not a vegetarian but healthier, whole foods that are low on saturated fats really don’t need as much refrigeration.

The past few days I’ve been getting a ton of blog traffic πŸ—Ί πŸ€– I think with people looking for places to camp and hike for the Columbus Day Weekend. One day I pulled in over $10 in ad revenue, and I’m in the low-$30s of what I’ve pulled in over the past week and a half of running ads. I think I will be close to $70 by the end of month, and while I won’t get paid until I rack up $100 in revenue, I think by December 1st I’ll probably be getting my first check πŸ’° which could easily be above $130 by my own estimates, though it depends how much demand drops for my blog as the winter season approaches. β˜ƒ Traffic usually drops fairly low in December and January. Maybe I need to do more maps relating to skiing and snowmobiling or winter camping locations. πŸ• But it will pick up again come April and May, having looked at my old web logs. It’s good because the $540 check to the web host goes out tomorrow for the next three years. Hopefully, within a year I’ll made enough from blog ads to be made whole, all while enjoying telling my story.

Looking ahead, there are 4 weeks until Daylight Savings Time Ends πŸ›₯️ when the sun will be setting at 5:46 pm with dusk at 6:14 pm. On that day in 2022, we had sunny, warm and temperatures between 71 and 46 degrees. Typically, the high temperature is 54 degrees. We hit a record high of 76 back in 1994.

Catskills

Watching Next Weekend’s Forecast 🌧

It really is too far to know how things will look for the start of my October vacation, though it’s currently tilting towards a weather pattern similar to this weekend — rainy and cold. But maybe not so wet, especially if I head south but the high country of West Virginia is going to be cool regardless.

I am still learning on a trip to West Virginia, though if it’s rainy next weekend, I might just drive down to County Bridge Campground in Pennsylvania, overnight there and head straight down to Canaan Heights. Driving in the rain is a bummer, but it’s better then camping in the rain, and to be truthful a good portion of both days would be driving regardless, due to the distances involved. And if it’s nice there is still the bulk of the week to enjoy in the Canaan Heights.

I am going to set up a base camp there, and while some days I’ll probably head out from camp with my truck, a lot of trips from there I will bike or hike from there. This time though I’m not going to cram in as much of West Virginia or Virginia as possible but would prefer shorter day trips getting to know the local area better. I need to locate my Monongahela National Forest Map, I think it’s with all my other paper maps.

Of course if it looks like snow is likely, then I’m taking West Virginia off the table. Likewise if it looks like the bulk of the week will be rainy or even cloudy, I will reconsider the mountain state, as I’m not going to drive super far just to camp in miserable weather. That said, I might stay in New York State, or possibly do a hybrid trip between the Finger Lakes and Wellsboro, PA to do the Pine Creek Rail Trail (and camp at Asaph Run Campground for a night or two).

Being that we are already looking at the third week of October, I doubt I would reschedule my trip plans regardless of the weather. But it could be a shorter trip, closer to home, if you consider under 200 miles each way to be closer to home. I could do an Adirondack Trip or the Tug Hill trip I mentioned before, though I would prefer to camp somewhere I can stay as many nights as possible. And it not be somewhere I can go anytime, like the Schoharie County or the Southern Adirondacks.

I don’t know, I’m watching it day by day.