Search Results for: photo lows upper dam 3

Map and Coordinates List for NYS DEC Firetowers πŸ—Ό

Discover a wealth of information on this page about fire towers situated on state lands, accessible through invigorating hikes that lead to panoramic vistas. Interactive maps guide your exploration, offering insights into the locations and trails leading to these towering viewpoints. Additionally, find convenient links to other pages that delve deeper into fire towers across the entirety of New York State. Embark on a journey that combines outdoor adventure with breathtaking scenery, as you navigate the trails and pathways leading to these historic landmarks that have stood as guardians of the landscape. This resource opens doors to captivating experiences that allow you to savor the beauty of nature from elevated perspectives while providing avenues for further exploration of New York’s fire tower heritage.

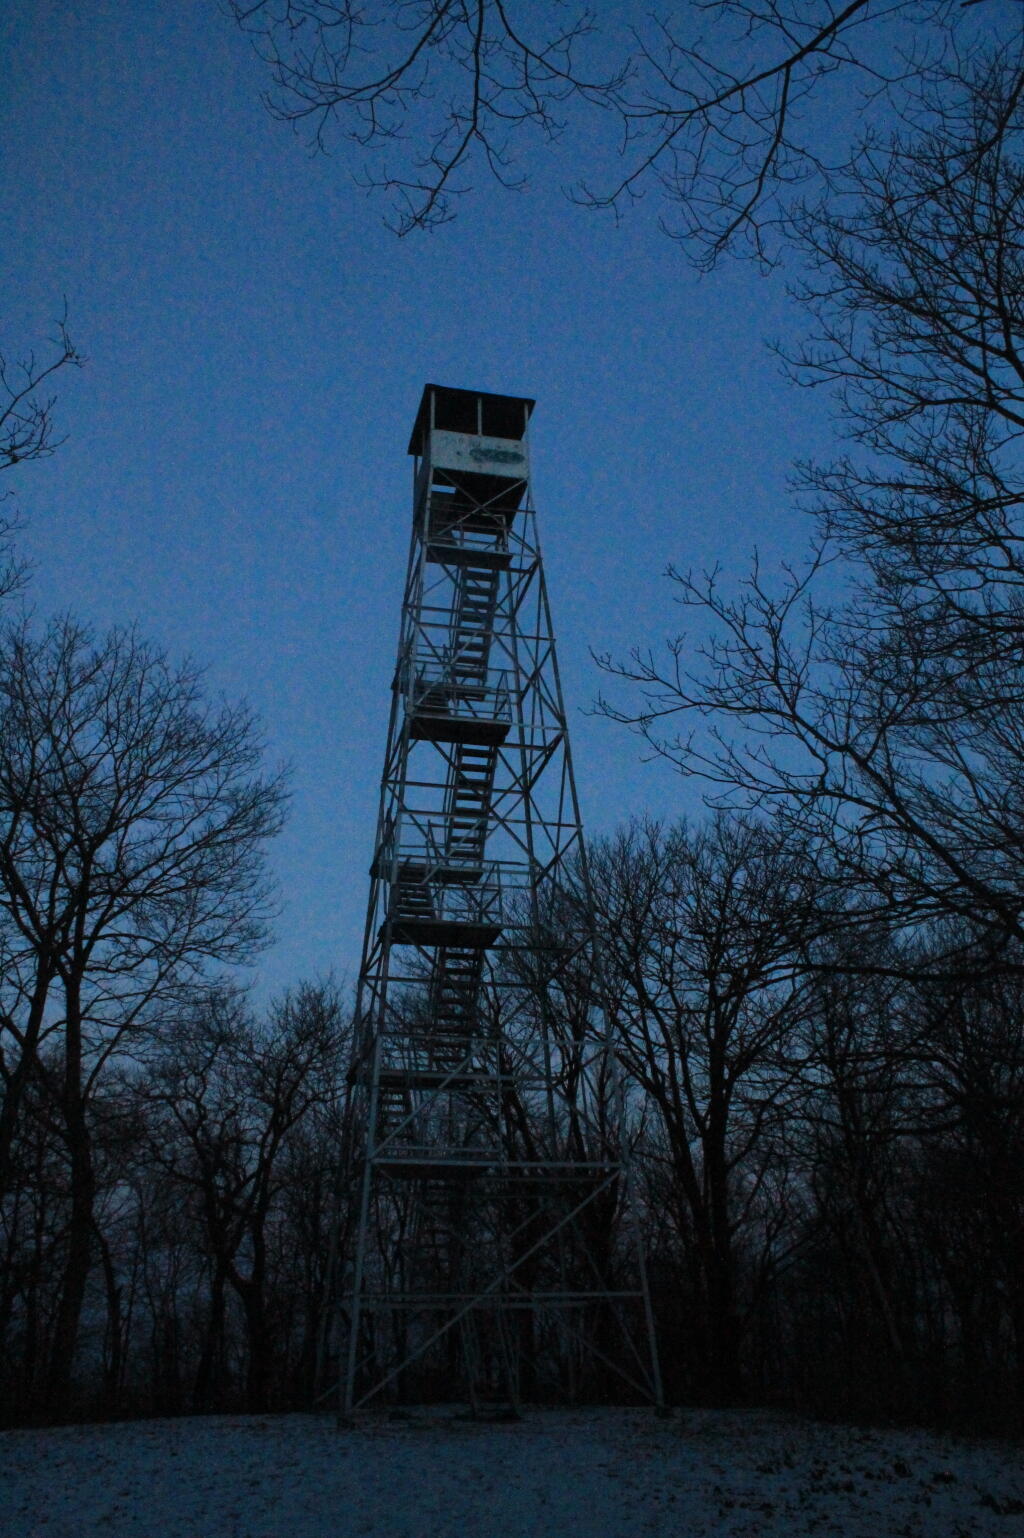
Here is a list of Fire Towers on NYS DEC lands. You can get this also on Google Sheets. Does not include the Dickinson Hill Fire Tower in Grafton, which is part of the Grafton Lakes State Park. You might also be interested in nearby camping opportunities.

TowerState LandNotesCoordinates
Azure Mtn. Fire TowerDebar Mountain Wild ForestRelatively short hike.44.5412601955876,
-74.5007131438668
Balsam Lake MountainBalsam Lake Mountain Wild ForestLonger hike along old road.42.0453530369935,
-74.5943882522534
Belfry Mountain Fire TowerHammond Pond Wild ForestVery short hike up dirt road.44.0977783227959,
-73.5480575565177
Berry Hill FiretowerMcdonough State ForestOnly up to second level is open, no upper level access.42.5498033738312,
-75.6903147862666
Black Mountain Fire TowerLake George Wild ForestLonger hike up a snowmobile trail.43.6068253423597,
-73.5315598873687
Blue Mountain Fire TowerBlue Mountain Wild ForestVery popular, worn-down trail.43.8722986188442,
-74.4007350580445
Lowville Demostration Area
Fire Tower
Lowville Demonstration AreaNo access to tower, part of demonstration forest.43.8093267984132,
-75.4730800808841
Goodnow Mountain Fire TowerSuny Esf LandsOpen to public, SUNY ESF Lands43.9598725064095,
-74.2096091339017
Hadley Mountain Fire TowerWilcox Lake Wild ForestPopular hike in Southern Adirondacks.43.3769100935034,
-73.9709647959219
Hunter Mountain Fire TowerHunter-West Kill WildernessMultiple approaches to this fire tower offer different hikes with different amounts of work.42.1779299997605,
-74.2297619994181
Hurricane Mountain FiretowerHurricane Mountain Primitive AreaThe only fire tower remaining in the Adirondack High Peaks.44.2352949729449,
-73.7101070215222
Kane MountainShaker Mountain Wild ForestShort hike near Caroga Lake.43.1810788942093,
-74.5151618559196
Beebe Hill Fire TowerBeebe Hill State ForestShorter hike near Austerlitz and Massachussetts border.42.3361525194561,
-73.4862760091067
Leonard Hill Fire TowerLeonard Hill State ForestYou can drive to this tower. Bottom floors removed, no access to tower.42.4510039574136,
-74.3529141572996
Lyon Mountain Fire TowerChazy Highlands Wild ForestLonger hike, new trail avoids severely erroded old trail44.7048354583899,
-73.8627762019644
Mount Adam Fire TowerHigh Peaks WildernessJust south of main high peaks area.44.0874829962416,
-74.0228637207712
Mount Nimham Fire TowerNimham Mountain MuaNear Beacon41.4611546516545,
-73.72510657899
Mount TremperPhoenicia – Mt. Tobias Wild ForestFollow an old woods road to summit.42.0739476727477,
-74.2781528438603
Mt Arab Fire TowerHorseshoe Lake Wild ForestRelatively short hike outside of Tupper Lake.44.2046152316571,
-74.5879293129745
Overlook MountainOverlook Mountain Wild ForestPopular hike outside of Woodstock, follows a gated road.42.085023587202,
-74.0933592964641
Owls Head FiretowerSargent Ponds Wild ForestModerate hike outside of Long Lake.43.9542904615568,
-74.4984616500416
Pillsbury Mountain Fire TowerJessup River Wild ForestMile long hike to a firetower with views over Perkins Clearing and areas around Spectulator43.5807556043109,
-74.5118079500206
Poke-O-Moonshine Fire TowerTaylor Pond Wild ForestNew trail is less steep and follows old woods road.44.4019104158425,
-73.5130620065356
Red Hill Fire TowerSundown Wild Forest1 mile hike to a fairly remote firetower.41.9238122519417,
-74.5170620256067
Rondaxe Fire TowerFulton Chain Wild ForestQuick hike outside of Old Forge that is very popular.43.7385880495938,
-74.9129188420394
Roosa Gap FiretowerRoosa Gap State ForestFiretower on the Long Path in the Shawgunks.41.6176280752519,
-74.4267422878805
Snowy MtJessup River Wild ForestPopular hike, one of the more difficult towers to access.43.7003213769888,
-74.3866001142199
Spruce Mountain Fire TowerWilcox Lake Wild ForestTrail crosses private land, closed during hunting season.43.2163188109202,
-73.9061192265182
St. Regis Mtn. Fire TowerSaint Regis Canoe AreaCurrently closed to public use.44.4085838385311,
-74.3296128971506
Stillwater Mountain Fire TowerIndependence River Wild ForestNear the Stillwater Reservior.43.8618343053993,
-75.033327606033
Sugar Hill Fire TowerSugar Hill State ForestObservation tower in Finger Lakes, during summer months you can drive to it, part of Six Nations Horse Cap.42.3871467022238,
-77.0025364212371
Vanderwhacker Mountain Fire TowerVanderwhacker Mountain Wild ForestRough seasonal road then 2 Β½ mile hike.43.8982271055416,
-74.0959123515681
Wakely Mountain Fire TowerWakely Mountain Primitive AreaNear Cedar River Flow at Moose River Plains. Seasonal use road to access.43.7358887903725,
-74.515229327937
Woodhull Mountain Fire TowerBlack River Wild ForestOne of the longer hikes, part of the trail is an old railroad grade until you climb the peak.43.6230161401271,
-74.9615452951445

Fire Tower

Moose River Plains Campsites

Interactive Map of Lean-Tos and Campsites

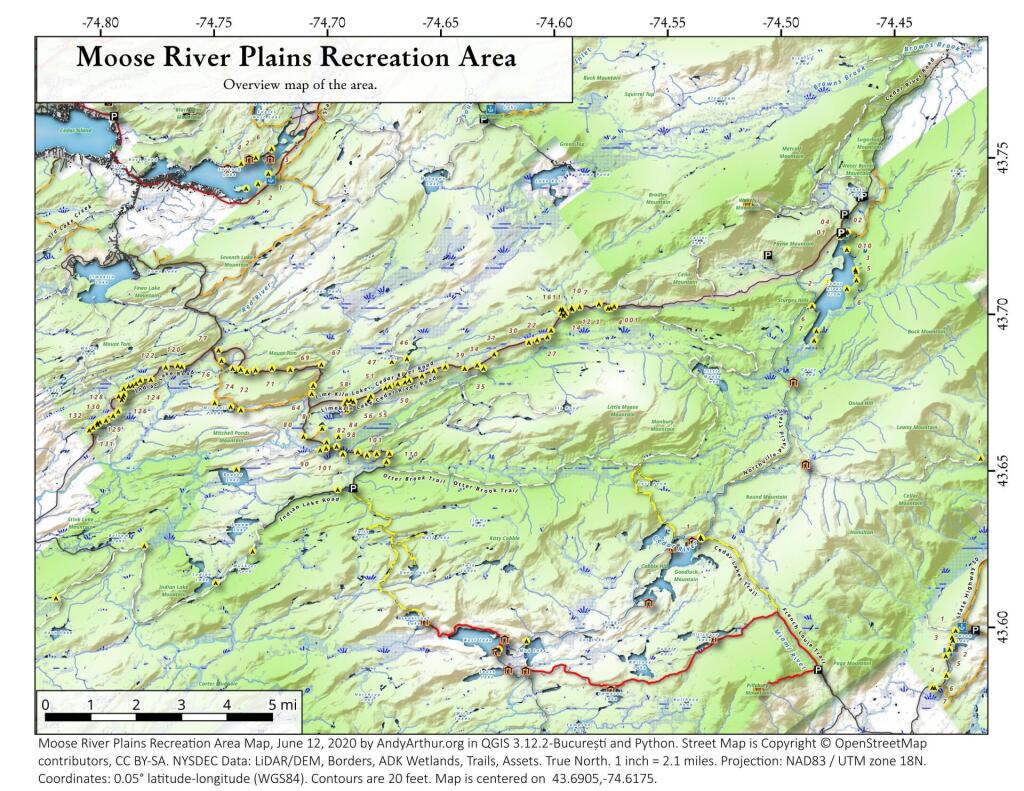
An overview map and list of campsites and their locations at the Moose River Recreation Area.

 Moose River Plains Recreation Area

Maps

Campsites

Milepoint Name Feature Notes Access Location
Cedar River Flow 1 Cedar River Flow Tent site on flow Boat 43.702924803151, -74.4871304116533
Cedar River Flow 2 Cedar River Flow Tent site on flow Boat 43.7104737708879, -74.4802343768254
Cedar River Flow 3 Cedar River Flow Tent site on flow Boat 43.7145237017622, -74.4679264444554
Cedar River Flow 5 Cedar River Flow Tent site on flow Boat 43.7111711590583, -74.4675178486588
Cedar River Flow 6 Cedar River Flow Tent site on flow Boat 43.7084767866376, -74.4717703157492
Beaver Lake Campsite Beaver Lake Site overlooks Beaver Lake Hike 43.6516613421651, -74.7407833400961
81 Icehouse Pond Accessible site at Icehouse Pond with privy Hike 43.6646602166505, -74.7029502913239
140A Indian Lake Campsite on Indian Lake, outhouse in bad condition Hike 43.6154753632731, -74.7499942080732
East of Muskrat Pond Indian Lake Trail Former roadside campsite, largely abandoned Hike 43.645116528704, -74.696221627206
46 Lost Ponds Trail Beyond the end of current Lost Ponds Road Hike 43.6868179572109, -74.6655581886723
47 Lost Ponds Trail Above Lost Ponds Hike 43.6859472953826, -74.6722052916864
Mitchell Pond 1 Mitchell Pond Tent site, bushwhack Hike 43.6729475881673, -74.7502538624373
Mitchell Pond 2 Mitchell Pond Tent site, bushwhack Hike 43.6716991892117, -74.7432124817486
64A Mitchell Pond (Accessible Campsite at End of Gravel Trail) Gravel path to site, wildrness privy Hike 43.6706136251028, -74.7387363015355
10 89 Beaver Lake Road Off Otter Brook Road, Sand Plains Vehicle 43.6583112347181, -74.7012491214803
11 90 Beaver Lake Road Off Otter Brook Road, Sand Plains Vehicle 43.6577446555162, -74.7038760912165
16 1 Cedar River – Limekiln Lake Road Driveway Along Tributary of Silver Run Vehicle 43.7033162602551, -74.5742148239156
16 3 Cedar River – Limekiln Lake Road Along Silver Run Vehicle 43.7027301523306, -74.5757742464803
16 4 Cedar River – Limekiln Lake Road Along Silver Run, driveway at Sharp S Turn Vehicle 43.7026421104662, -74.5769731929134
16 7 Cedar River – Limekiln Lake Road Along Silver Run Vehicle 43.7040070126376, -74.5809411044503
15 10 Cedar River – Limekiln Lake Road Old gravel pit, accessible Vehicle 43.7031498027862, -74.5893864145496
15 11 Cedar River – Limekiln Lake Road Across from 12 Vehicle 43.702458607149, -74.5926546451668
15 12 Cedar River – Limekiln Lake Road Across from 11 Vehicle 43.7028667147947, -74.5929833340894
15 13 Cedar River – Limekiln Lake Road Along Silver Run Vehicle 43.7010402113051, -74.5956355707995
15 14 Cedar River – Limekiln Lake Road Along Silver Run Vehicle 43.7010328498576, -74.597457469967
14 16 Cedar River – Limekiln Lake Road Access Road for 16/17/18 Group Vehicle 43.7025294616695, -74.5969885248639
14 17 Cedar River – Limekiln Lake Road Access Road for 16/17/18 Group Vehicle 43.7021028692463, -74.5966599329259
14 18 Cedar River – Limekiln Lake Road Access Road for 16/17/18 Group Vehicle 43.7023846304313, -74.5978818600647
14 19 Cedar River – Limekiln Lake Road Along Silver Run Vehicle 43.7003546491841, -74.5964872856253
14 21 Cedar River – Limekiln Lake Road Across road from Silver Run Vehicle 43.6957217888458, -74.6020563094081
13 22 Cedar River – Limekiln Lake Road Across road from Silver Run Vehicle 43.6935817523545, -74.6036764840587
13 27 Cedar River – Limekiln Lake Road Across road from Silver Run Vehicle 43.6926540634024, -74.6082201775478
13 30 Cedar River – Limekiln Lake Road Open Area in Woods Vehicle 43.6918525577623, -74.6118452191364
13 31 Cedar River – Limekiln Lake Road Near Marsh off Silver Run Vehicle 43.6881856235873, -74.6271629609656
12 34 Cedar River – Limekiln Lake Road Open Field Near Old Sly Pond Road Vehicle 43.6846954329325, -74.634678249126
12 35 Cedar River – Limekiln Lake Road Former Sly Pond Road Vehicle 43.6836690328942, -74.6318552827363
11 38 Cedar River – Limekiln Lake Road On Hill Overlooking Road, near start of Lost Ponds Area Vehicle 43.6836029270341, -74.6401393590772
11 39 Cedar River – Limekiln Lake Road Above CRLLR, start of Lost Ponds Area Vehicle 43.6841476346233, -74.6487511980121
11 40 Cedar River – Limekiln Lake Road Above CRLLR, start of Lost Ponds Area Vehicle 43.682942162164, -74.6537793571789
11 41 Cedar River – Limekiln Lake Road Above CRLLR, start of Lost Ponds Area Vehicle 43.681311345096, -74.6589116717693
10 42 Cedar River – Limekiln Lake Road Above CRLLR, start of Lost Ponds Area Vehicle 43.6799039050817, -74.6646031695507
10 43 Cedar River – Limekiln Lake Road Above CRLLR, start of Lost Ponds Area Vehicle 43.6793727911294, -74.6664156654099
10 44 Cedar River – Limekiln Lake Road West of Lost Ponds Road, Sand Plains Vehicle 43.678808787762, -74.6696555368193
10 50 Cedar River – Limekiln Lake Road West of Lost Ponds Road, Sand Plains Vehicle 43.677986610504, -74.6732025802129
10 51 Cedar River – Limekiln Lake Road Pull-Off, Small Site, Sand Plains Vehicle 43.6775108499728, -74.6750146421403
10 52 Cedar River – Limekiln Lake Road Old gravel pit, short loop below CRLLR Vehicle 43.6748840847288, -74.6815273754233
10 53 Cedar River – Limekiln Lake Road Access Road for 55/54/55 Group, Sand Plains Vehicle 43.6733317629897, -74.6820452615144
10 54 Cedar River – Limekiln Lake Road Access Road for 55/54/55 Group, Sand Plains Vehicle 43.673268538603, -74.6822820352903
9 55 Cedar River – Limekiln Lake Road Access Road for 55/54/55 Group, Sand Plains Vehicle 43.6733705968856, -74.6827076379887
9 56 Cedar River – Limekiln Lake Road Driveway, East of Former Dump, Sand Plains Vehicle 43.673126585883, -74.6891475571674
9 57 Cedar River – Limekiln Lake Road Has Trail to Moose River Vehicle 43.6736673106707, -74.6902687046523
8 64 Cedar River – Limekiln Lake Road Near Mitchell Pond Trail Vehicle 43.6757521870177, -74.707500815672
8 66 Cedar River – Limekiln Lake Road Near Pine Creek Vehicle 43.6784203854214, -74.7068492021325
7 67 Cedar River – Limekiln Lake Road Benedict Creek Road, Wooded Vehicle 43.6851041444828, -74.7031887110586
7 69 Cedar River – Limekiln Lake Road Remote site, perched over the road Vehicle 43.6834516958835, -74.7168906980223
6 70 Cedar River – Limekiln Lake Road Large loop off of CRLLR Vehicle 43.6839906014562, -74.7249870178447
6 71 Cedar River – Limekiln Lake Road Very sandy site near Mitchells Pond Upper Loop Vehicle 43.6833776353921, -74.7321947941391
5 72 Cedar River – Limekiln Lake Road At end of Bear Pond Loop Road (Accessable) Vehicle 43.6828956047277, -74.7359084701559
4 73 Cedar River – Limekiln Lake Road Very sandy site near Mitchells Pond Upper Loop Vehicle 43.6835777053685, -74.7387188889593
4 74 Cedar River – Limekiln Lake Road On a hill overlooking road and marshy area Vehicle 43.6839187521201, -74.742285779317
4 76 Cedar River – Limekiln Lake Road Very sandy site near Mitchells Pond Upper Loop Vehicle 43.6864452702399, -74.7471689344191
4 77 Cedar River – Limekiln Lake Road Near Red River, Bear Pond Loop, Sand Plains Vehicle 43.6897961458669, -74.7484803840413
10 58 Helldiver Pond Road Near Helldiver Pond Vehicle 43.6735979105991, -74.6920316000423
10 59 Helldiver Pond Road Near Helldiver Pond Vehicle 43.6723766419894, -74.6929318681131
10 60 Helldiver Pond Road Near Helldiver Pond Vehicle 43.6713193532923, -74.692758456613
10 61 Helldiver Pond Road Accessible site at end of Helldiver Pond Road Vehicle 43.6705019900204, -74.6921751440693
15 West of Brooktrout Trail Indian Lake Road Past Brooktrout Trail, on a hill over road Vehicle 43.6254538914434, -74.7337300739322
10 48 Lost Pond Road Sand Plains, Marshes Aroubnd Vehicle 43.6814268347573, -74.6667101324338
11 49 Lost Pond Road Sand Plains, Marshes Aroubnd Vehicle 43.6819456385478, -74.6670131106595
10 80 Otter Brook Road Has Trail to Moose River Vehicle 43.6620917920003, -74.7112181918076
11 98 Otter Brook Road Above Moose River on Hill Vehicle 43.6588725644731, -74.6966603409996
11 101 Otter Brook Road Sand Plains Vehicle 43.6564420559443, -74.6938956128147
11 103 Otter Brook Road Sand Plains Vehicle 43.657108724794, -74.6873446316172
12 104 Otter Brook Road Wooded Site Vehicle 43.6560617426567, -74.6832992891923
12 106 Otter Brook Road Wooded Site Vehicle 43.6565121581975, -74.6789913497265
13 110 Otter Brook Road Wooded Site Vehicle 43.6566072628101, -74.6733859460379
13 111 Otter Brook Road Near Otter Brook Bridge Vehicle 43.6539235327721, -74.6747718892435
23 1 Wakely Dam Camping Area Accessible site Vehicle (before gate) 43.7266767212397, -74.474100266424
23 2 Wakely Dam Camping Area Field Camping Vehicle (before gate) 43.7266515010084, -74.4733110730078
23 3 Wakely Dam Camping Area Field Camping Vehicle (before gate) 43.7259595122959, -74.473899965642
23 4 Wakely Dam Camping Area On Driveway to Lake Vehicle (before gate) 43.7260676922081, -74.4742326471903
23 5 Wakely Dam Camping Area On Driveway to Lake Vehicle (before gate) 43.7255637908987, -74.4741751228291
23 6 Wakely Dam Camping Area On Driveway to Lake Vehicle (before gate) 43.7252231337487, -74.4745830371916
23 9 Wakely Dam Camping Area Across bridge Vehicle (before gate) 43.726275356142, -74.4717840349063
23 10 Wakely Dam Camping Area Across bridge Vehicle (before gate) 43.7266308152758, -74.4712600272389
10 82 Otter Brook Road On Moose River Vehicle (driveway) 43.6603083771227, -74.7010353925305
11 84 Otter Brook Road On Moose River Vehicle (driveway) 43.6619962517853, -74.6957783254417
6 120 Natural Rock Dam Road Sand Plains near Red River Vehicle (Opens July) 43.6848543033273, -74.7664253595203
6 122 Natural Rock Dam Road Wooded Site Vehicle (Opens July) 43.684367353989, -74.7717171949716
6 123 Natural Rock Dam Road Wooded Site Vehicle (Opens July) 43.6804228755091, -74.7782951743141
6 124 Natural Rock Dam Road Wooded Site Vehicle (Opens July) 43.6792030487765, -74.7847972548314
7 125 Natural Rock Dam Road Wooded Site Vehicle (Opens July) 43.6783559964111, -74.7880327043169
7 126 Natural Rock Dam Road Wooded Site Vehicle (Opens July) 43.6748535298235, -74.790591643043
7 127 Natural Rock Dam Road Wooded Site Vehicle (Opens July) 43.6739776362472, -74.7910844137006
7 128 Natural Rock Dam Road Wooded Site Vehicle (Opens July) 43.6751413481917, -74.7924842843025
8 129 Natural Rock Dam Road Wooded Site Vehicle (Opens July) 43.6703784784539, -74.7926312803463
8 130 Natural Rock Dam Road Wooded Site Vehicle (Opens July) 43.6666270858056, -74.8019151989726
8 131 Natural Rock Dam Road Wooded Site Vehicle (Opens July) 43.6643581634434, -74.8054154753831
8 132 Natural Rock Dam Road Wooded Site Vehicle (Opens July) 43.6652083016168, -74.8036826184027
5 119A Natural Rock Dam Road Sand Plains near Red River Vehicle (Opens July) 43.6844716021433, -74.7646961785253
6 123A Natural Rock Dam Road Wooded Site Vehicle (Opens July) 43.6802422604152, -74.782965042166
6 124A Natural Rock Dam Road Wooded Site Vehicle (Opens July) 43.6785899888224, -74.7864319884685
6 125A Natural Rock Dam Road Wooded Site Vehicle (Opens July) 43.6776017274889, -74.7902229325712
7 126A Natural Rock Dam Road Wooded Site Vehicle (Opens July) 43.6756110574941, -74.7901645681643
8 129A Natural Rock Dam Road Wooded Site Vehicle (Opens July) 43.6689370211979, -74.7948887917477
8 129AA Natural Rock Dam Road Wooded Site Vehicle (Opens July) 43.6674497436753, -74.7980604042935
8 130A Natural Rock Dam Road Wooded Site Vehicle (Opens July) 43.6661052974262, -74.8016557609016
8 130AA Natural Rock Dam Road Wooded Site Vehicle (Opens July) 43.6669094078356, -74.8007390664074

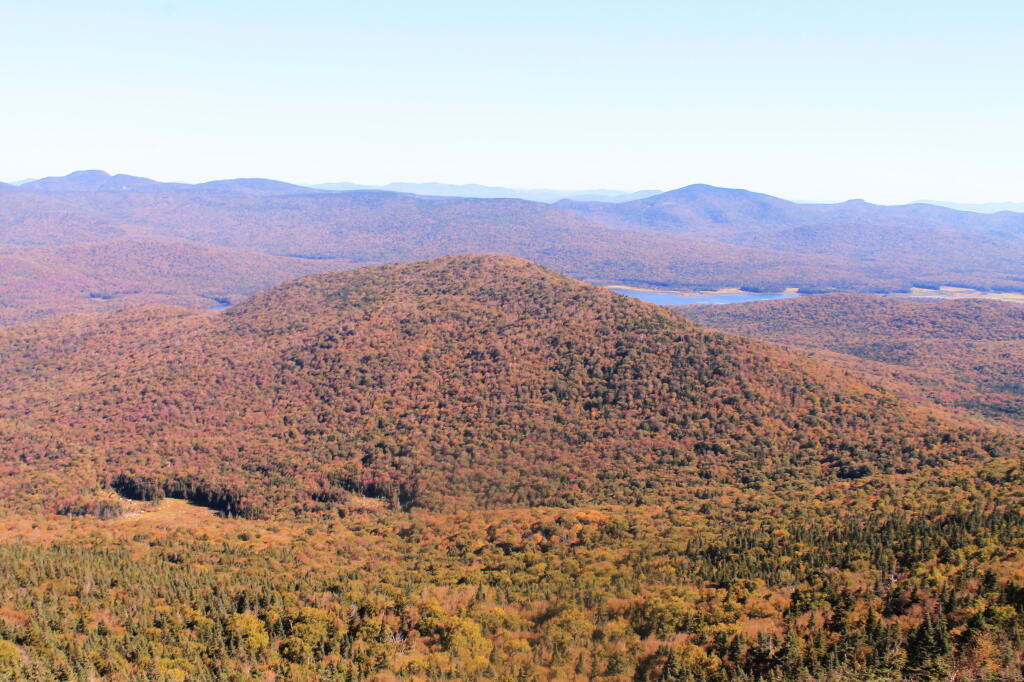
Payne Mountain with Cedar River Flow Beyond It

New Theme for the Blog. Central Vermont/Green Mountains This Extended Weekend. Lift Kits vs Other Toys. Getting off the Grid.

Good Morning! Happy Wednesday.Β Yes, folks it’s Wednesday. I think this is the first note I’ve done in a few months, but so be it. It really isn’t that hard to do notes, especially now that I’ve switched WordPress, and everything is pretty much standardized and easy to use. It’s a long one, jotted down over the past week,w with lots of things to talk about.

Working on a New WordPress Theme for the Blog. When I brought the blog over to WordPress, my intent was not to create another generic looking WordPress blog, although in many ways that’s how it ended up. I also messed up some of the code, and didn’t build a proper client theme, instead relying on an adapted theme.

The result was a kind of bland mess. The good news is I am now learning how to build a proper client theme on top of an existing, much nicer WordPress theme — that doesn’t look so much like a generic WordPress theme. One of the reasons I avoided for so long going with WordPress, as I didn’t want to end up with a very generic theme. But somehow it all ended up that way. I think the new theme I am going to — based on the popular Pinboard theme is much nicer.

Hopefully it will be up by the start of September, if all goes well. New maps up are on the blog today.

Sitting in the river until it get really dark

Heading Up to the Northern Half of Green Mountains this Weekend.Β Probably leave Friday after work, first camp in the Southern Green Mountains near Somerset Reservior, then head North on Vermont 100. Β There looks to be a lot of neat places to see in the northern Green Mountains, Β and some spectular scenery.

Plan to stay for a long weekend, by also taking off Monday and Tuesday, which promise to be pretty nice weather. As I don’t really know the area, a lot of the trip will be about seeing what is up there, and going from there to figure out what to do. I will bring the kayak and camera, and certainly are keeping my mind open to taking a nice hike somewheres. They are talking about a continuation of the recent low-humidity, temperate climate weather over the weekend, especially as we head into Monday and Tuesday. Supposed to be some good meteor showers.

I’ve decided to do more of these long weekends, rather then take any full weeks off this summer. I guess you could say the July 4th week was technically a week off, although actually July 4th and July 5th were holidays at the office, so they didn’t really count.

I might take a week-long trip in October to Western NY and Pennsylvania during peak foliage season. That said, I also want to do an extended weekend trip to Moose River Plains and also Lake Kushaqua/Jones Pond and recently re-opened Loon Mountain firetower.

Going to Put Off Getting the Lift-Kit Installed Until at Least March.Β Originally the plan was to have a lift-kit installed on my truck in October. But after giving it more thought, and carefully reviewing the options, I’ve decided the best option is to wait another six months or so. For one, I want to wear down the stock tires more, so I’m not wasting them as much, and also so I’m a bit closer to end of the factory warranty — the lift kit isn’t covered by the truck’s factory warranty, and while it wouldn’t invalidate the whole warranty, certainly any damage (as unlikely as it is) it could cause wouldn’t be warrantied.

But the other part of the rational is partly money-wise, and because I’m not totally sold on the lift-kit idea. I’ve thought about getting Β a snowmobile instead this winter, and have been looking at Want Ad Digest. That said, the more I look at it, the more I am not in a rush to get a snowmobile. As much fun as it would be to get deep in the back country in winter — assuming there are groomed trails back there — I worry about break downs and the alike. Not to mention, snowmobiles use a lot of gas, and really aren’t much more efficient then automobiles, because the snow drags them down.

The money-wise issue comes in that things are more expensive then I first estimated a year ago. I think I am going to go with 35s and a 6″ lift kit from a good brand like BDS. Any bigger then that isn’t cost-effective, and non-pratical. That will get me up high enough. The final increase in the height of the truck will be something like 8 inches, because the 35s are 4 inches larger in diameter then factory 31s, and a six-inch lift is half foot higher.

31626460002_large

I also think I will go for full-leaf replacements in the back rather then add-a-leafs, to ensure the weight of the camper shell and equipment in the back won’t cause the nose to be pointing in the air, etc. Going to have it re-geared to save fuel, add some more power, not kill the engine or tranny. And there are some other things like the narrower brake lines that are recommended, among other parts, I would probably spring for when it comes to lift-kit. Plus all that labor cost, which will easily be a grand on it’s own.

I want to ride up higher. I am a tall guy. It also will give me a chance to “freshen” up the look of my truck, which after 2 1/2 years will be getting kind of boring and old. I want something I can get 10 years or more out of without getting totally bored with. After I do the lift kit, there are other projects for future years, such as getting the rocker panels Line-X’d, and replacing the bumpers with those awesome Ranch bumpers, that can actually be used for parallel parking without being damaged.

Or maybe I’ll find other toys to spend my money on. It’s good having some extra disposable money kicking around, as I’m sure future jobs won’t nearly pay as much.

Been Reading and Watching More Videos About Getting Off the Grid. Being somebody who camps most weekends from April to November in the back of my pickup truck, and relies heavily on my inverter and the deep cycle battery to keep things lighted up all evening long. I cook my own food in the woods, clean dishes using bottled water, burn my garbage, and dig a whole in Β woods when I need to go to the bathroom. Heck, with my laptop and the wireless card, I can be up in woods and surfing the web, doing work, and even fielding calls over my cellphone.

I have a pretty decent working understanding of electricity, and how all the off-the-grid thing too. I grew up in the country, are comfortable in woods, and know how to build a good fire in woodstove. I am fascinated to learn more about some of the relatively inexpensive and simplistic living arrangement many-off-the-griders live with, without all costs and hassles of an on-grid house.

My grandfather had one of those absorption-cooler refigerators/freezers in his RV at his campsite in Warrensburg. They’re neat, as one needs more then just a cooler when you live somewhere permanently, rather then wondering the wilderness in your pickup truck. They burn like 5-10 gallons of propane a month. But there also is these high-efficiency refrigerators that are electric and have a lot of insulation, so they don’t strain batteries in a PV/micro-hydro/wind system as much.

But a bigger issue for me is the ability to take showers and get cleaned up properly wherever I live. For that purpose, there are amazingly small tankless-water heaters that use a small amount of propane, but can get water very hot quickly. If you think small, you don’t really need that much flow, compared to a full-scale modern house with a massive-tanked water heater. Hot showers, and hot water for dishes is a necessity to keep clean. If I can get away with it from the code inspectors, I’d be fine with composting toilets or even just a plain old outhouse. That’s a luxury in woods.

Woodstoves, radiant flooring, and other familiar technology is self-explanatory. Having good insulation is a must in this part of the country. I don’t want to have trash pickup — I’m happy enough burning what can be burnt, and taking the glass and metals for proper recycling in the normal industrial fashion.

I like small houses. Smaller is better. I would rather spend my money on land, that could not only be used for recreation like riding quads, shooting guns, and hunting, but also for money by grazing livestock and timber. I am not a greeny, I don’t got a problem with using styrofoam plates for dinner and disposing them in an open fire. I just hate the whole upper-middle class, fancy house living style in the suburbs.

All this reading library books gots me thinking …

But for now I’m fine. As a transition though, I think I would next like to live in a small, handsome, downtown, one that is walkable to a bar and a store, but also provides ample-off-street parking. I think it would be a lot of fun to have an apartment on the second or third floor, above a shop, and be able to sit out and look at my window and watch the traffic go by.

Anywhere I live, I want to be near a National Forest or State Forest that allows free, primitive camping, in a remote-roadside fashion. Not to mention scenic vistas, places to hunt, fish, hike, and spend time outdoors. But I really want to get out of New York, at least eventually. I think it would be fun to own an AR-15, and eventually get a concealed carry permit from a must-issue state, without any pesky questions about whatever stupid things I did decades ago back in college — that hurt nothing but folks egos. To say nothing of not being in a state that’s totally anti-rural and not into the philosophical nature thing.

Far off I guess. Things aren’t that bad right now.

Making Maps of Round Lake Wilderness in QGIS

You are thinking about going to the Round Lake Wilderness for a Canoe Trip. You would like a map, but don’t want to spend $10 bucks to buy one, when you get a better looking map for free with more accurate data from the NYS Department of Environmental Conservation and NYS Department of Transportation, using a free GIS program known as Quantum GIS or “QGIS” for short. When you are done with this tutorial, you will end up with a map that looks like this.
Fermented

QGIS like all GIS programs can seamlessly glue together multiple topographic quadrangles (such as the Sabbist and Little Tupper Lake quads needed for this map), and then superimpose campsites, trails, and other data you need β€” that might not be available on a typical topographic map. As your printing your own map, you don’t have to worry about keeping it dry or keeping it from getting damaged.

All GIS software is highly technical and a bit complicated to use. Putting together a good map is a fair bit of work, but once you master it, you will be able to put together quite nice looking maps. I hope this rather length fodder article will send you on your way to making good maps of NY State.

Step 1: Download and Install QGIS.

First you need to download a free copy of the open-source Quantum GIS program from QGIS.org. It runs on Windows, Linux, or Mac OS X and is relatively easy to install. Then open QGIS on up. It will look something like this, depending how many plugins you have installed and your version of QGIS.

Hint: Save your work regularly when working in QGIS by going to File -> Save Project menu. It’s always good to save regularly in any GIS program, as your dealing with large files, and its always possible that QGIS could crash, and you would lose your work.

Step 2: NYS DOT Topographic Index.

Next, you will need to get some data to fill up that blank screen. You will probably want to go the NYS GIS website and download the 7.5 minute topographic index (aka 1:24,000 scaled topographic maps). This “Shapefile” β€” a file containing data used to draw shapes, dots, or lines in a Geographic Information System (GIS) program β€” contains an overview map of NY State, with boxes representing each of the 965 7.5 minute topographic maps that make up NY State.

NY 1:24,000 Topographic Map Coverage Index Shapefile. (90 KB) Contains the outlines of all 965 7.5′ topographic maps in NY State. Freely available from NYSGIS Website, under the Digital Raster Quadrangles.

Download, expand, and open the NYSDOT Topographic Map. You can open it in QGIS by using Vector -> Add Vector Layer.

7.5 minute topographic maps are the most accurate topographic maps typically available. The NYS Department of Transportation provides high-resolution, 509 DPI, scans of all 965 topographic maps it creates. Each scanned in map is in a file called a “GeoTIFF”, and is divided into 3 or four files, consisting of each color used on a standard DOT topographic map.

Step 3: Projection.

It’s Very Confusing, BUT VERY IMPORTANT!!

When you load that 7.5 minute topographic index into QGIS, you might be surprised to see how that map is distorted, and does not look like the map above. This is because the earth is not a flat surface, and there are many ways to draw a map of the earth, to reflect the curvature of the earth. We call that the projection of the map β€” how we project a curved surface on a flat sheet of paper or a flat screen.

There are actually thousands of ways to project the surface of the earth, such as unprojected latitude and longitude (called WGS84) that squashes north and south on maps, regular Mercator which puts things on an even latitude or longitude on a flat plain (NY State appears with a flat border along Pennsylvania at the 42nd parallel), and Universal Transverse Mercator (UTM), which most accurately shows distance and relative position of items, at the cost of over distance appearing somewhat distorted.

For all your New York State mapping projects, you are only going to use one projection β€” Universal Transverse Mercator (UTM) Zone 18. This is one set in official state regulations as what all state agencies are supposed to use, and it’s what NYSDOT Topographic maps are drawn in. For your adventures in making maps for hiking, camping, hunting, fishing, and boating, your going to want to always use NAD83 / UTM Zone 18N in NY State.

Go to File -> Project Properties, and click on the Coordinate Reference System (CRS) tab. Browse through the list for NAD 83 / UTM Zone 18N. Click on “Enable ‘On the Fly CRS Transformation”.

Clarification. Then click the triangle next to Projected Coordinate Systems, then click the triangle next to Universal Transverse Mercator, then scroll down to NAD 83 / UTM Zone 18N (ESPG:26918). Alternatively on the search box on that same page, search for Authority: All, Search for: ID, and enter in 26918. QGIS will remember your settings and default to this projection for future projects.

To ensure everything is projected in NAD 83 / UTM 18N, make sure to Enable ‘On the Fly’ CRS Transformation. QGIS will automatically convert “Shapefiles” and other vector data into the proper projection. QGIS can not do this for scanned in images or similar “raster” data.

Check and recheck to make sure you did this projection step correctly. Otherwise, you will get messed up maps, and you will get lost. Confusing, definitely but the most important step.

Step 4: Now Let’s Load Some Data.

Shapefiles and vector data are all loaded in the same way. You download the file, expand it, and load it into QGIS. Here are some Shapefiles I recommend you download and load into QGIS:

DEC Lands Outlines Shapefile. (5.4 MB) Contains the outlines of all lands under the control and jurisdiction of the Department of Environmental Conservation. Does not include Town Parks, Canal Authority Parks, Parks Maintained by Office of Parks, Recreation, and Historic Preservation. Also does not include Conservation Easements. Freely available from NYSGIS Website, under the DEC Section.

DEC Roads and Trails Shapefile. (5.8 MB) Contains many of the roads and trails maintained by the DEC. Does not include local, county, or state roads, and in some regions of state, there is no trail data available. Freely available from NYSGIS Website, under the DEC Section.

DEC Physical Assets Shapefile. (0.2 MB) Contains many of the physical facilities maintained by DEC β€” specifically lean-tos, back country campsites, boat launches, fishing docks, firetowers, etc. This is available using a Freedom of Information Law Request. The DEC will send it to you in 5 days, if you email the Records Access Officer. I have put a copy of this file on my blog, of the exact form I got it back from the DEC, to allow you to avoid unnecessary FOIL requests.

OpenStreet Map: NY State Shapefile. (105 MB) I found this some time ago on a now defunct website and have made several modifications to it over the years. It is freely available data, originally based on US Census TIGER lines, but with certain modifications, such as removing certain roads from wilderness areas. One should consider it public domain as it’s just US Census data, and you are free to edit and redistribute it. You can download my copy from this blog.

Once you load the data into QGIS you should be able to zoom in and explore the map, and get a general idea of what area you are interested. The random colors chosen by QGIS to display this data are pretty hideous, but we will change them in a bit.

Zoom into the area you interested in, by looking at the general outlines of the public lands. You can use the maganifying glass to zoom in, the hand to move around, and the cursor next to the (i) icon, to display information about various features.

Step 5: NYSDOT Topographic Maps.

Next we need to figure what NY State Department of Transportation (NYSDOT) 7.5″ topographic maps we will need to make a “base” map of Round Lake. Click the cursor next to the (i) icon, then onto the the map, where you need to figure out what topographic map you want. As I see from the results, I will need the Sabbatist Quadrangle (among 4 others nearby), which is available from NYSGIS.

NYSDOT Topographic GeoTIFFs at 1:24,000 Scale. (2 MB per quad) There are 965 quads in NY State. The NYSDOT topos have the most up to date roads on them, and come with each color layer seperate. The average file is about 2 MB. I downloaded the whole set from their FTP site, but you can download only the ones you need at first, but having the full set sure is convient.

NYSDOT Topographic Maps are scanned at 508 DPI, and are georeferenced NAD 83 / UTM 18N GeoTIFF images, that QGIS will automatically position on map for you to create a seamless map across data layers, as long as you properly set the projection in QGIS in Step 2. Maps will line up perfectly, even a certain map consists of many different quadrangles.

I do not recommend the USGS Digital Raster Graphic (DRG) Quadrangles. They are typically older, use the obsolete UTM 18 / NAD 27 coordinate system, and do not have individual files for each color layer. Moreover, the 1:100,000 Digital Raster Quadrangles and 1:250,000 Digital Raster Quadrangles, do not have the needed resolution (detail) for doing hiking or other outdoor maps. If your doing a broad overview maps β€” like for spotting peaks off a firetower, they might be useful, but not for general use.

Each NYSDOT Topographic Map consists of 4 different black and white GeoTIFF images. There is no transparency data in this maps, nor any color in them. You are free to set transparency or color as you please. They are as follows:

  • plan – Man made features and labels such as roads or mountain names. May also include unnavigable streams, borders on lakes, etc. Anything that would be printed black on the NYSDOT topographic map.
  • hyd – Lakes and navigable waterways. Anything that would be printed light blue on the NYSDOT topographic map.
  • topo – Topographic lines showing general elevation and slope. Anything that would be printed light brown (color of topographic lines) on the NYSDOT topographic map
  • bua – Built Up Area, background. Areas that have a lot of development, such as cities. Anything that would be printed light pink or yellow on a NYSDOT topographic map. I usually don’t use this layer, not found in rural quads.

You can load them using the Layer Menu -> Add Raster Layer, menu item. Using the control key, you can load multiple files at one. I try to load all the layers I will need at once, as it can take time to load layers, and it’s good to get it done at once.

Remember, these are scanned in images or pictures of the topographic maps, they can not be easily edited or queried in QGIS. Zoom in too far, and they become pixelated. Yet, they usually provide an excellent back drop for outdoors maps.

When you first load one of these maps, you will see a picture like this. The topographic layers for some reason chose to load first, and appear on top, and with no color or transparency set, they are pretty useless out of the box.

Typically you will want to arrange the topographic layers, so that the plan layers are on top, followed by the hyd layers, then the topo layers, and finally the bua layers. With the plan layer up top, the map will start to make a little bit more sense, give you a better idea if you loaded the proper quads.

Next you will want to go through every GeoTIFF Topographic Map layer you have uploaded, and change white to transparent. You do this by right clicking on each layer, and choosing Properties. Then click on the Transparency tab in the Layers Properties dialog that comes up.

Double click on -32768.00 on the Indexed Value column, and change it to 0. This will make all white portions of the map 100% transparent. NYSDOT Topographic Maps do not contain any useful transparency data, so you will want to make all white areas in the map transparent.

If you are working on a hyd layer, topo layer, or bua layer, you will want to go the color map layer, and change the color for value 1.00000 by double clicking on the color next to it. Black is the default color, but that isn’t helpful except for the plan layer. You need not change the 0.0000 color, as you have already set that to be transparent, and it will not be visible on the map.

Then click OK, and the dialog will close, and transparency and colors will be visible on the map layer you just changed. Besides those awful background colors, the map that is being displayed starts to look a lot more useful now.

Right click on NYS_QuadIndex and choose Properties. Go to the Style tab. While we really do not have to use this layer any more, and could just disable it by unchecking it, I like to use it as a yellow background to indicate non-DEC lands on a map. To do this, click on the color box next to Fill Options, and set it to light yellow, as I did, or whatever color you want to represent private lands. Then go to Outline Options and choose an invisible line, to hide the quad boundaries.

It’s now starting to look a little better.

Now it we do the same with DEC Lands Outlines, setting it white or whatever color you prefer. Make sure it’s dragged above NYS Quad Index on the Layers, but below the Topographic Maps. I prefer no borders to be shown, as I find DEC boundaries to be confusing, as often Wilderness borders Wild Forest or Primitive Areas, leading to strange lines appearing in the maps. If you care about such borders, do leave them on though.

Now you got a map that is almost ready for use, that is once we delete roads that we know don’t really exist in a wilderness area, stylize campsites versus other facilities, stylize roads versus hiking trails, and maybe add some labels.

Step 6: Stylizing Roads versus Trails.

I like to make hiking trails a dashed black line of 0.75 map units, and roads a solid black line of 0.75 map units. This ensures on black and white printers one can tell the difference. To do this, right click on DEC Road and Trails, then the Style tab. From here, choose Unique Value from Legend Type.

We will use the MOTORV field to decide if something is a road or a hiking trail. Obviously, if this was a winter map, we might change this field to SNOWMOBILE or X-COUNTRY SKI. This field contains, ‘Y’, ‘N’, ‘M’, ‘U’, and sometimes ‘YES’, ‘NO’, depending on the forest ranger that inputed the data. Set the style as you wish.

Choose classification field MOTORV, then click the classify button. All of the different possibilities for roads or trails allowing motor vehicles will be shown. From there, set the colors and line styles as you so choose.

Step 7: Removing Invalid Roads from NYS Highways Shapefile.

If you use the OpenStreet Map Highway file future on the page, you will see it often has lines that overlap DEC hiking and truck trails, and has old woods roads or other invalid data, that you will need to delete to clean up your map, and avoid confusing users. It’s pretty safe to delete all highways from Wilderness-areas, unless you are sure that such a road actually exists.

You need to right click on New York Highways Shapefile, and choose Toggle Editing. A pencil will appear next to that layer. Then use the select tool on the second toolbar, in the upper left (selected in box below). Highlight the streets you want to delete, and they will appear yellow.

Use the Delete Selected button to delete the roads you have highlighted. Notice buttons nearby that allow you to split features into multiple features. These are helpful if you know only part of a road has been closed or abandoned, and you want to remove only part of the road from your map.

I zoomed in on Round Lake to search for other invalid roads I wanted to remove. Looks okay now, although I still question some of those roads located in Whitney Headquarters. Having not been there, I can not say which ones have been gated or abandoned, so I will leave them on for now. Right click on the NY Highways Layer to save your changes to that Shapefile.

Step 8: Stylizing Assets.

Next we need to change the various DEC Physical Assets from a single color dot, to icons that represent the asset. With the current map, we can not tell the difference between a campsite, a parking area, or trail register. This could be rather confusing for anyone using our map.

This is very similar to changing the symbols for roads versus hiking trails in the previous step. Go back to the properties dialog. This time, we want to stylize things based on Unique Value, then Classification field Asset. Then, click Classify. This will create unique color for each icon. By browsing the “Point Symbol”, you can now give primitive campsites proper looking icons. Don’t forget to set the size. I usually set icons at Size 3.0 or 4.0, but it varies a lot on the final scale of the map.

Finally, I zoomed in to check on my work. Wit the icons set, we have a pretty nice looking map. I can spot the campsites, parking areas, trails, and the private property-public lands boundaries. I know where to put in my kayak, to explore Round Lake. It’s too bad, I don’t know which if any roads to remove from Whitney Headquarters, so I’ll have to go in person if I want to correct the map.

Step 9: Adding Labels to Trails and Roads.

Yet, I would also like to see some names on the roads and trails. Select the DEC Trails layer. Go to Layers menu and choose Labeling. From here, click Label This Layer, then choose Fields with Labels and select Name. The default style of 12 point fonts is almost always too large for most maps, a font size between 5 to 7 points is what you mostly likely will use. Then select, Buffer to create a small white background around each label. This is usually necessary to make your labels appear readable on the map.

Then click the Advanced tab. The default placement for labels is Parallel, which labels the largest amount of items, but doesn’t look very pretty. Curved is the prettiest, but it will not label particularly twisty lines. Priority controls which labels are most important if you have multiple layered roads. I usually set NYS Highway Shapefile to a low priority as the underlying topos usually also have road names, and trails to a much higher priority.

So now you should be set with labels. You have to do this with each layer with labels, such as the NYS Highways layer. You can do this also with the assets layers, although I generally do not bother, as I don’t really care about the sometimes lengthy names the DEC gives campsites.

Step 10: Printing and Making Images to Export.

Looking at a map in QGIS is kind of fun, but pretty useless when your on the trail. Go to File -> New Print Composer. A dialog like this will appear.

Next, you will want to change the paper size to something more reasonable then A4. Most likely you’ll choose Letter-sized paper. Below that set the resolution. Choose the orientation most appropriate for your map, I often use Landscape. To get high quality map print outs, you will want to set the the quality box somewheres between 300 to 500 dpi. Even if you are just exporting as a picture, it is good to preserve the resolution for future printing.

Then click on the canvas icon (circled in blue), to draw the surface the map on your canvas. This will provide you a canvas to draw on your page surface. You may wish to click “Snap to Grid” and set “Spacing to 5.0” to make it easier to line the canvas up. Click the magnifying glass, with the plus sign or the icon directly to the left of it, to expand the window so it’s easier to work on the canvas. This doesn’t change output, only the display on the screen.

Next, click Item tab, and then the Extents label. This will bring up the map extent box. The extents of the map will be listed in Northing and Easting, a series of large numbers that tell you how many meters you are North and East of the Greenwich, England. This is the standard form of measurement used by the Universal Transverse Mercator positioning system. Just click, “Set to Map Canvas Extent”.

Click Map. You can use the Earth on Hand Tool (circled blue on this screenshot), to move around the image on the map. Then you can go to the scale box, and adjust the zoom. Smaller numbers mean more zoom in. A standard topographic map is at 1:24,000 scale, however, I generally prefer a scale of 1:18,000 or so to make the map more readable. If you zoom in too far, the topographic map β€” a raster map, will become pixalated. In addition, if you zoom in too far in or out, you will have to adjust the thickness of trails on the map, and the size of icons.

Scale Bar, Labels.

The labeling tool is fairly self explanatory. It appears like a tag on the top of the screen (circled red). Use it to add labels, such as the name of the map and other details. Set the font, background color, and other options under the Item tab and the various lablels.

More challenging is adding a scale bar. Draw it using the scale bar tool (circled in green). The big hint here is that topographic maps are projected in Universal Transverse Mercator or UTM, which is a metric system. Each map unit is equal to one meter. Chances are you don’t care about kilometers. Set Map units per bar unit to 1610, which is roughly 1610 meters per mile. There are actually closer to 1609 meters per mile, but you will never notice the difference, as the map is at too large of a scale to notice that extra meter.

Then set the Segment size (map units) to a fraction of 1610. I typically do maps at 1:18,000 scale, so a segment size of 402.5, which is equal to 402.5 meters or 1/4 mile works perfectly. For larger maps, you’ll want to use a segment size of 805 meters (1/2 mile), or maybe even 1610 meters (1 mile).

Below Map units per bar unit is 4 Right segments and 0 Left segments. Set them as you please, but if your doing a 1/4 mile per segment scale, then the default of 4 usually works well.

Finally, don’t forget to type in a unit label. This doesn’t effect anything, but it’s nice for the user of the map to know what the scale is done in.

Step 11: Printing or Saving.

Most of the time you’ll want to save your map as a JPEG image, that you can open up at any time easily, add to a Microsoft Word document, email to friends, or print at a later time. I circled the save as an image button with a yellow circle. Assuming, you set the resolution sufficiently detailed (such as 300-500 DPI), you’ll get an excellent print out later on. Save your image and your done.

Alternatively, you can print directly from QGIS. I circled the print icon with red. I do not recommend this option, as it’s a pain to have to open up the saved QGIS project, and then the open print composer, every time you need a particular map, compared to having it saved. Even on fast computers, loading QGIS can take a bit of time to load and navigate.

Conclusions.

Fermented

If all goes well, you should end up with a map that looks like this map. Your styling choices may be different, but you will still know where to put your kayak out, when going up to Round Lake in the Round Lake Wilderness, and the location of all the campsites.

I appologize if I missed any major steps. There are a lot more you can do with QGIS, but I wanted to cover the major steps, and provide hints for some of the things I found most confusing about using QGIS when I started using it regularly about a year ago now. I hope this is helpful. β€” Andy

Camping at Horseshoe Lake, Aug 12

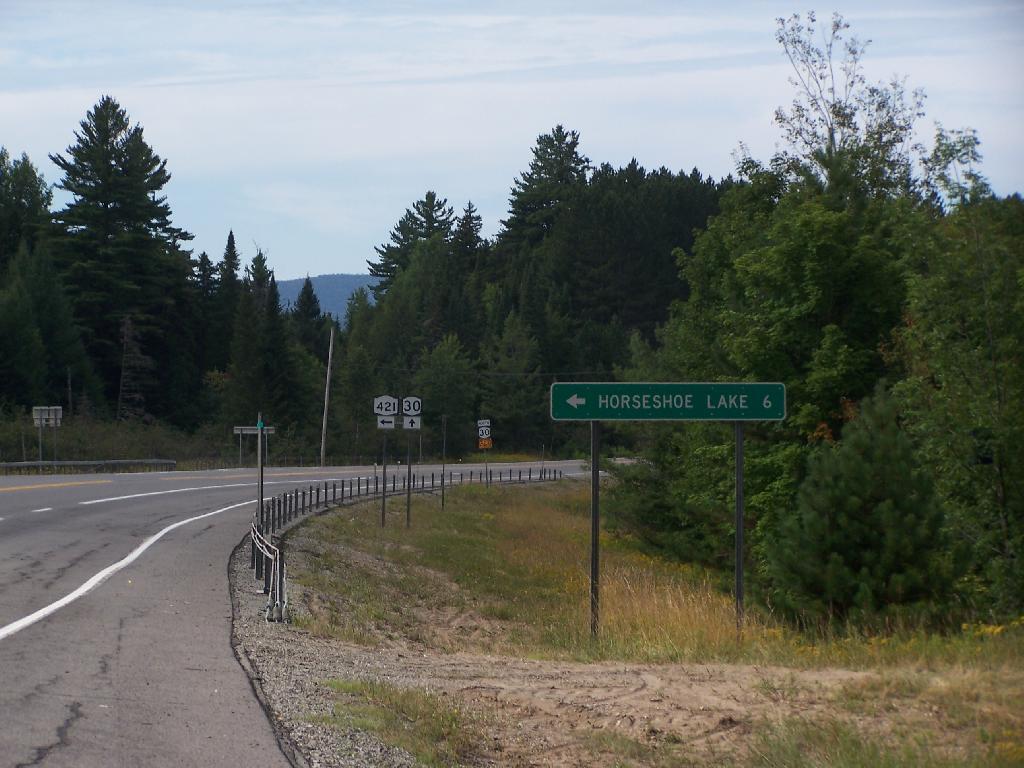
Horseshoe Lake is located on South Eastern Saint Lawrence County, on a dead end state highway, NY 421, a spur from NY 30 South of Tupper Lake. It offers 6 campsites scattered along the lake, with 6 others on nearby roads. It is also near the Bog River Flow Canoe/Kayak Area. Don’t expect to get a campsite on the lake in the afternoon, but the sites along the truck trail are rarely used.

Six Miles to Horseshoe Lake. This is the turn off for NY 421, one of the strangest state highways in the state. It is a dead ended highway, that leads to gravel roads around Horseshoe Lake and Bog River Flow. It is very twisty and narrow, and portions have not been resurfaced in over 50 years.

Six Miles to Horseshoe Lake

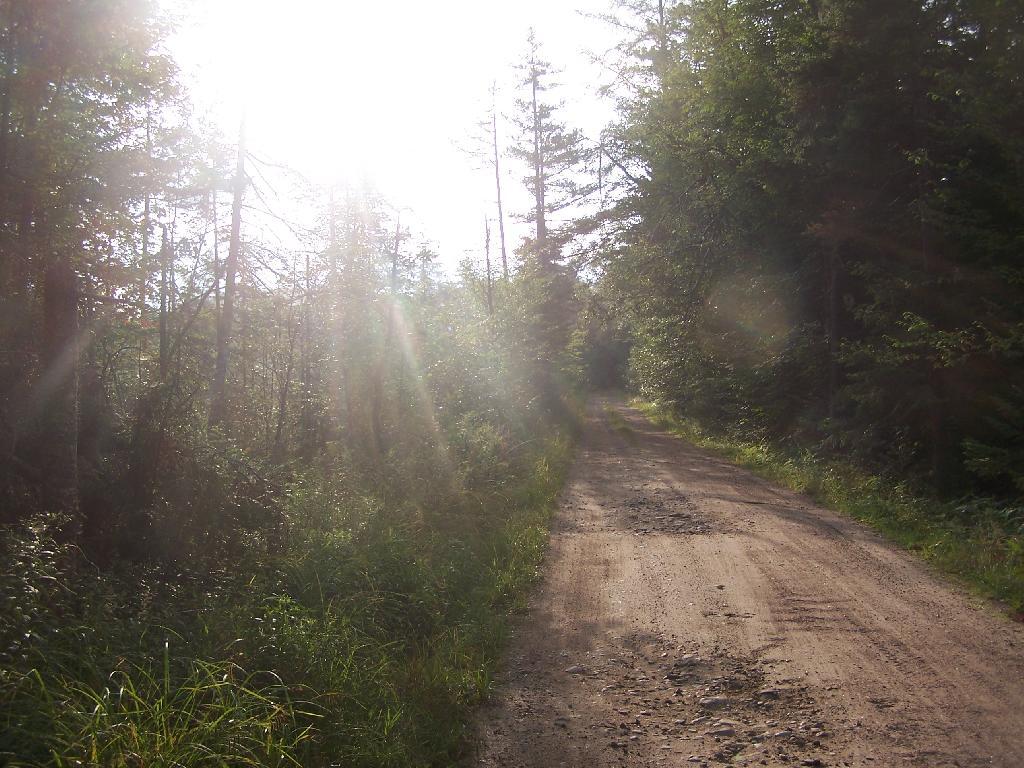
After The Pavement Runs Out. About a two miles from the paved end of NY 421, I camped. This is first thing in the morning, with the sun shining down from the wetlands near where I camped.

After The Pavement Runs Out

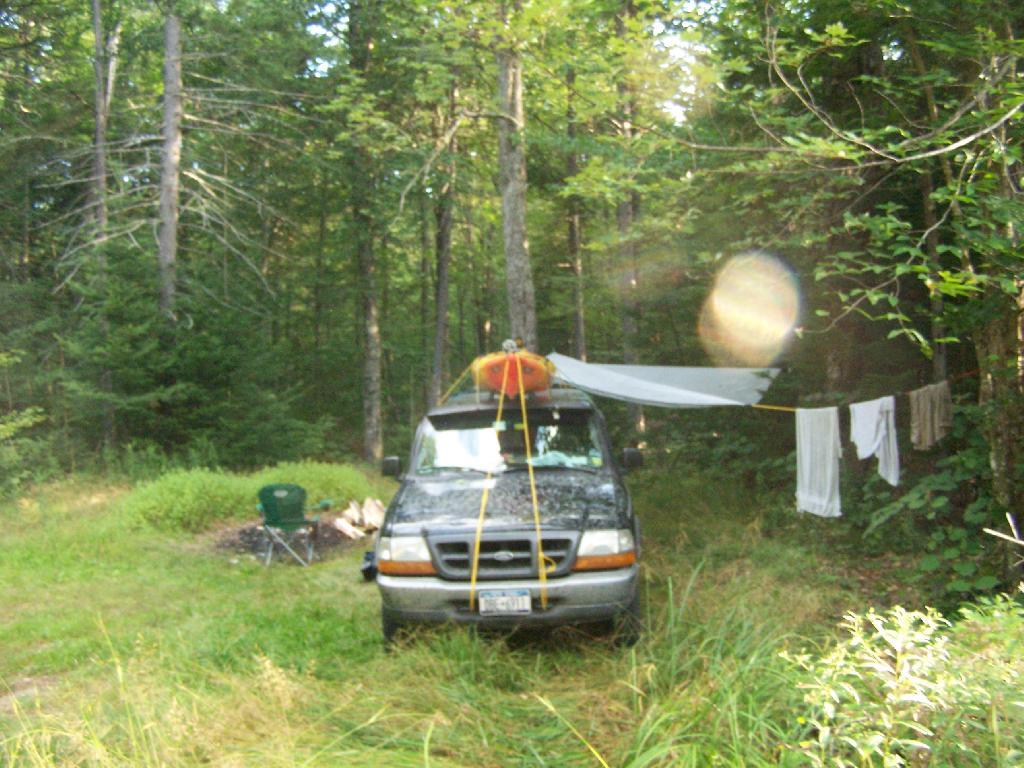
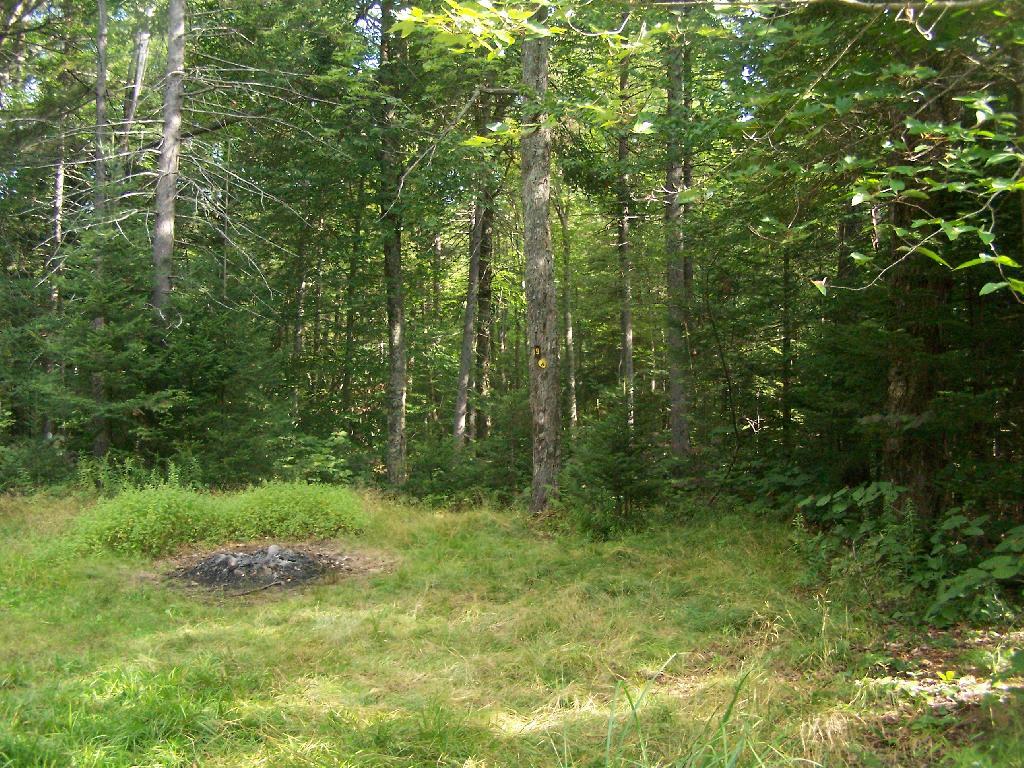
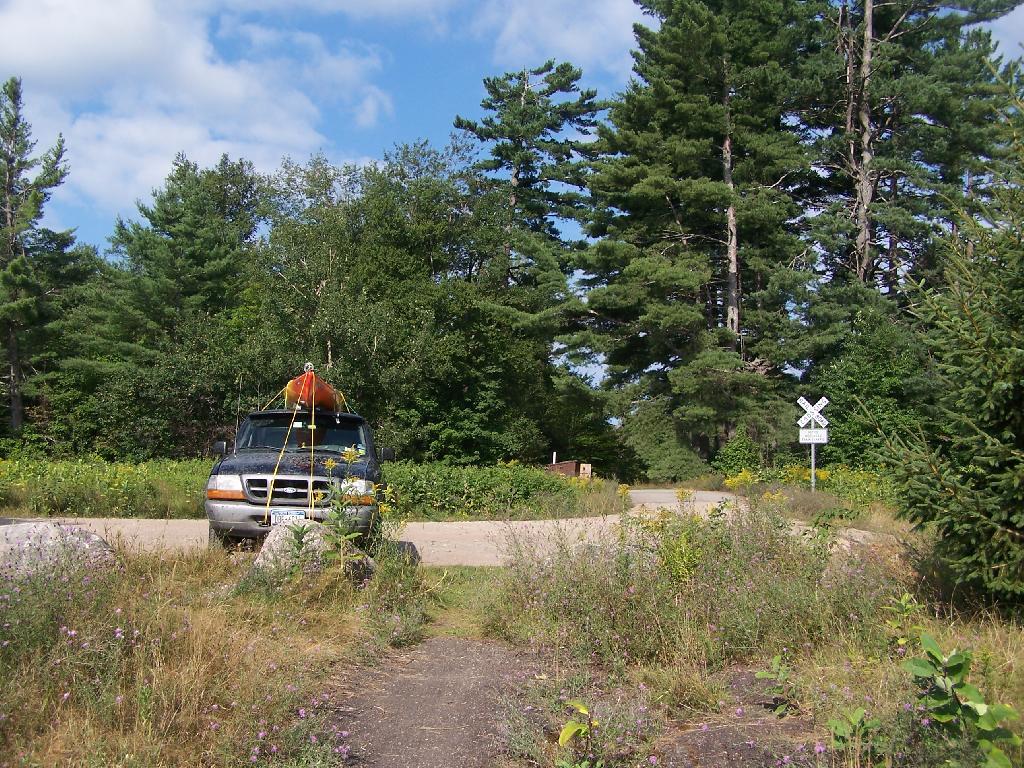
Campsite No 9. This is Campsite No 9 at Horseshoe Lake, on an Unnamed Adirondack Park Road, about two miles from the end of NY 421/Paved. I could not get site on the lake, arriving at 5 PM at night, but it’s still a nice campsite. This area of Saint Lawrence County is so remote, only 2 big pickup trucks, and logging truck passed by in the 12 or so hours I was there.

Campsite No 9

Not Fancy Campsite. By no means was Campsite No 9 on the Unnamed Road, particularly fancy. But it provided a place to camp, and was a three minute drive down to the lake. I could have gotten a spot on Horseshoe Lake most likely had I arrived in the morning, as it seemed like campsites tended to clear out in the morning.

Not Fancy Campsite

Road Crosses Railroad Tracks. This is where the weird hair-pin turn appears on maps at the end of NY 421. I’m not sure why it follows this route, as the terrain is flat, but maybe at one time there was an inholding or private home located in here.

Road Crosses Railroad Tracks

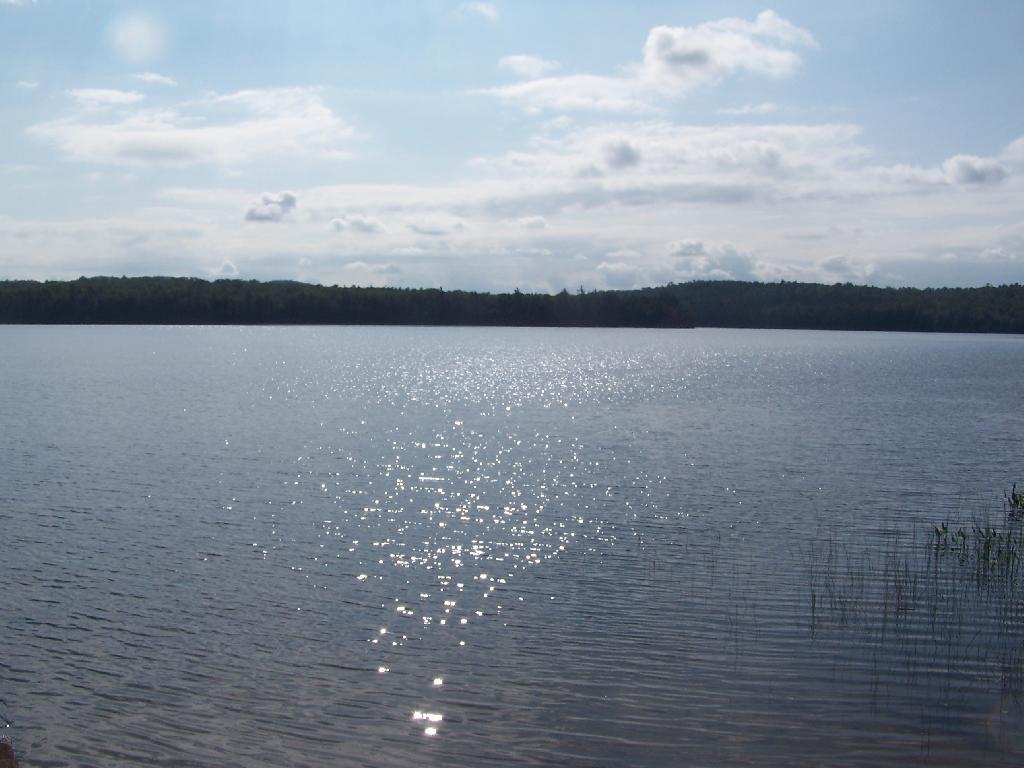
Horseshoe Lake in Morning. Heading swimming in a couple of minutes. The water was real nice.

Horseshoe Lake in Morning

Cowboy Hat, Swimming Trunks, Work Boots. Not that you could get the total picture from this image. But the cowboy hat and work boots came off before the dip. A real country boy thing.

Cowboy Hat, Swimming Trunks, Work Boots.

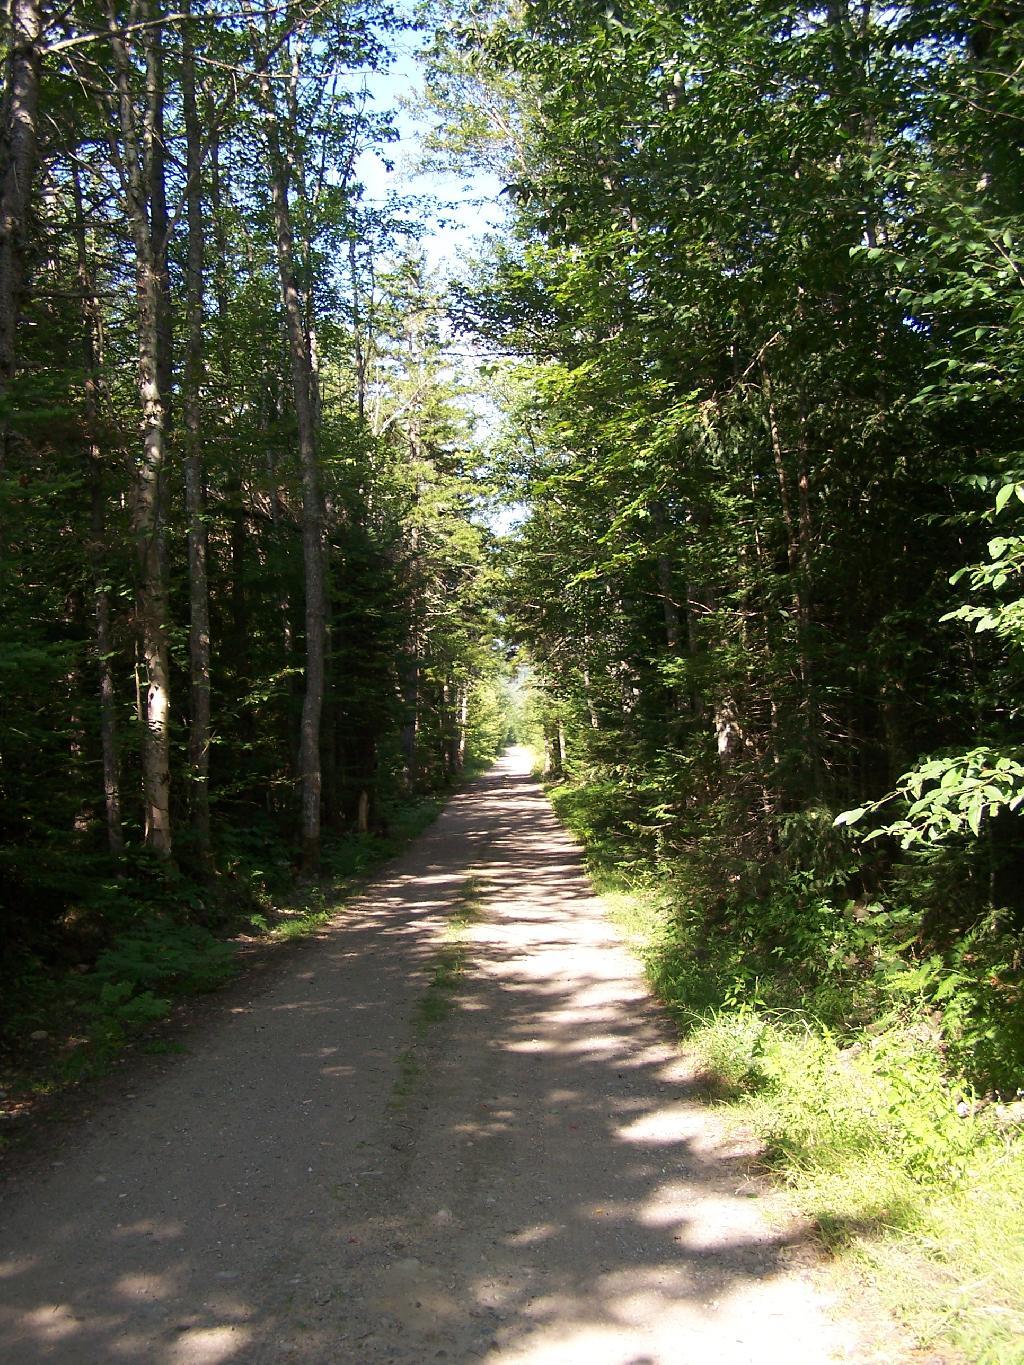
Unnamed Dirt Road. This is the road that goes from Horseshoe Lake to Mount Arab / Piercefield.

Unnamed Dirt Road

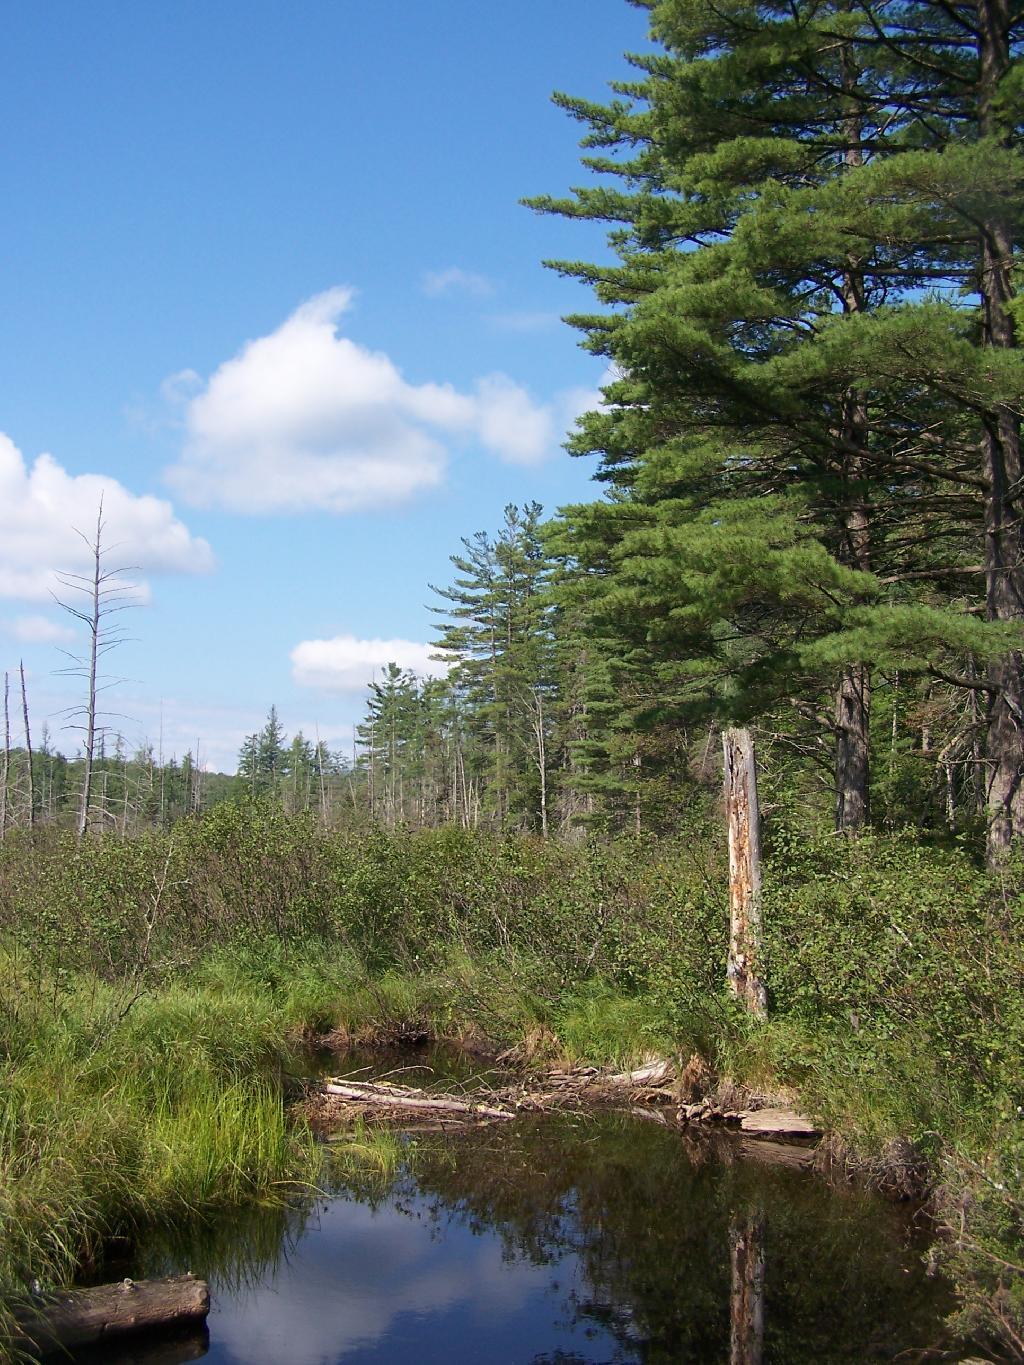
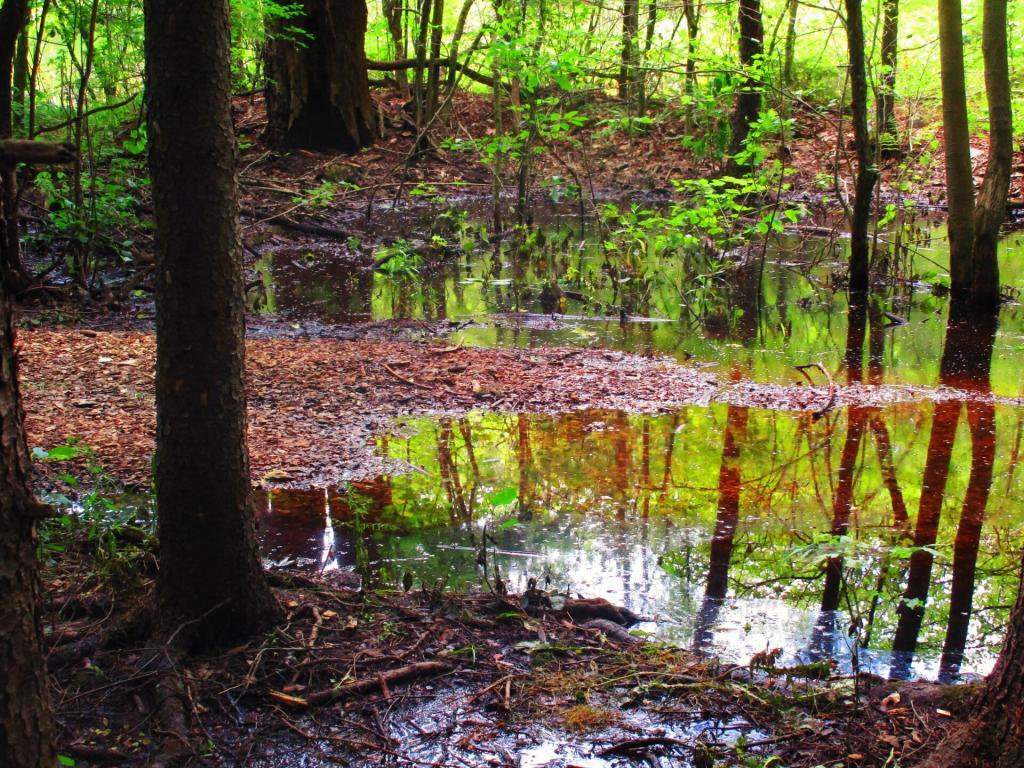
Wetlands Along Horseshoe Lake. This is about a mile after the pavement runs out on NY 421, just after the Bog River Flow / Lower Lows Dam Road turn-off

Wetlands Along Horseshoe Lake

Here is a map of where I camped, on the truck trail, west of Horseshoe Lake.


View Larger Map